Sustainable Fabric Disposal Options

Sustainable Fabric Disposal Options

Selling Your Fabric

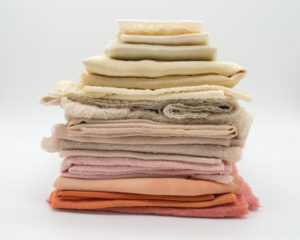
Wooden Spools in Englewood buys fabric, though their website with the buying details is currently down. This is a good option to recoup some of the money spent on larger cuts of quilt shop quality fabrics. Craft Scraps in Littleton buys quilting fabric by the pound. However, an appointment is required for all sales and there is a ½ yard minimum. For the full list of requirements, click here. The Craft Box in Wheat Ridge purchases supplies by appointment. There are many restrictions on their buying, so make sure to read through all the rules. The Hidden Treasure in Longmont accepts craft donations or will sell your items on consignment. You can see the full policies here.

Donating Your Fabric

RAFT Colorado in Denver is a reuse center specifically for teachers. They accept fabric as well as many other craft materials, you can find the full list and drop off hours here. Art Parts in Boulder is a nonprofit creative reuse center that accepts donations most Fridays and Saturdays, but make sure to check the website to make sure there isn’t a donation hiatus. View all the rules and find out how to get a 10% off coupon when you donate. ReFrame Creative Reuse Center and Makerspace in Denver accepts material donations. ReFrame is a nonprofit committed to providing sustainable, affordable supplies. Check with local schools, libraries, Girl Scout troops… Kids don’t care about the quality of fabric and they can be a great for them to learn to sew. Fabric can also be cut up and used in art projects. It’s worth taking the time and making a few calls to see if these items would actually be useful to the organization, you don’t want to burden them with items they don’t know what to do with. You can also contact with thrift stores to see what their textile donation policies are.  

Recycling Your Fabric

Most H&M stores have a clothing recycling collection bin. You can read the full details of their commitment to recycling fabrics and what they do with the items. USAgain has textile recycling bins in the Denver area where you can drop off clean textiles. Click here to find a bin location. American Textile Recycling Service has donation bins around the area, find locations here. Eco-Cycle CHaRM (Center for Hard-to-Recycle Materials) in Boulder accepts any clean fabrics one square foot or larger for recycling. The full material list and drop off hours are available on their website. Star Industrial Supplies in Denver accepts fabric and clothing that can be resold, reused, or donated. They recycle more than 97% of the textiles they accept and send clothing around the world to be worn again. I could not find donation information on their website, but you can contact them at (303) 295-7737. The Broomfield Recycling Center offers textile fabric for Broomfield residents, but check your local recycling center for recycling details.  

Other Great Options to Consider

Days for Girls creates menstrual kids for girls in developing countries. You can sign up to actually sew the items for the kits, or you could just donate your fabric to a local chapter. They need 100% cotton fabrics that are dark or patterns, but no patterns with animals or people. The pieces should be at least 12″ square. If you have dark flannel, they always need that and have a harder time getting it donated.  Use tiny scraps instead of polyfill stuffing. If you’re making a plush, why not stuff it with those tiny fabric scraps you have from trimming countless HSTs? Or use them to make a dog bed and donate it to an animal shelter.   If you have any resources we haven’t listed, please let us know!  

Quilt Sleeve for Hanging Large Quilts

By Laura Loewen

The BoulderMQG 2018 show, An Exploration in Sustainable Modern Quilting, requires specific hanging attachments for any quilts that are accepted. Be sure that any accepted quilt(s) include the correct attachments for hanging. The following is a tutorial for creating and adding a sleeve to larger quilts. For our show, any quilt measuring wider than 30” will require a sleeve. If a sleeve is not added to your accepted entry we may use other means to hang and display the quilt, such as folding and draping the quilt over a display bar. Please add a sleeve to any quilt larger than 30” wide. However, quilts wider than 60” may still be folded for display because of our space restrictions. Below we provide instructions for adding a sleeve to your quilt after it has been bound.

Adding a Hanging Sleeve After Binding


Step 1

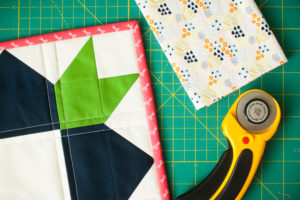
Gather supplies; finished quilt (bound) and fabric to make hanging sleeve.

Step 2

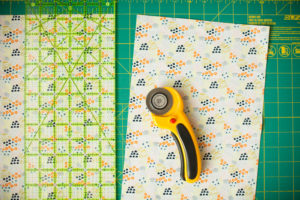
Cut fabric to make sleeve. Piece together if needed.

9.5” Wide X [width of your quilt] Long

Step 3

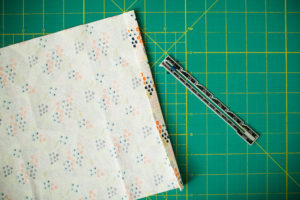
Press short ends. Fold over ½” and press, fold over again ½” and press.

Step 4

Sew folded ends down.

Step 5

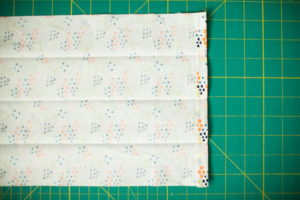
Fold in half lengthwise, wrong sides together. Press to create a center crease.

Unfold and fold one long edge in to the middle lengthwise. Raw edge should run parallel with center crease. Press.

Unfold and fold the other long edge in to the middle lengthwise. Press.

You will create 3 creased folds.

Step 6

Fold on center crease, wrong sides together. Sew ½” seam allowance along raw edge lengthwise creating a tube. Secure ends with backstitch.

Step 7

Minding the existing creases, press seam open. Take care to keep outer creases pressed as they were before sewing the seam.

Step 8

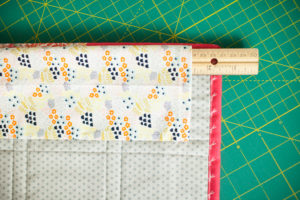
Align center of quilt with center of sleeve tube. Keep the seam side down, hiding the raw edges. Pin top crease of sleeve running parallel to the top edge of quilt; approximately ½”-¾” from top edge, just inside binding. Align creases so the tube is dimensional away from the quilt. The back of the quilt will be flush with the back of the sleeve. Pin the sleeve to the quilt along the bottom crease.

Step 9

Hand sew along both the top and bottom edge of sleeve. At the sides of the sleeve, stitch down only one layer keeping a tube opening. Take care to only stitch through the quilt backing and not through the front of the quilt.

Step 10

Remove pins after finishing stitching sleeve down.


Your finished sleeve should be dimensional to allow for our hanging hardware. It should stay completely hidden behind the edges of the quilt when it is hung.


Submissions for An Exploration in Sustainable Modern Quilting will be accepted through September 1, 2018. If your quilt is smaller than 30″ it will need corner triangles for hanging, please see the corner triangle tutorial.

Corner Triangles for Hanging Small Quilts

By Laura Loewen

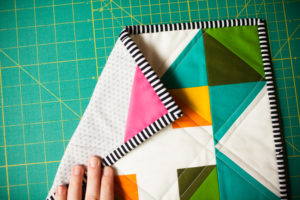
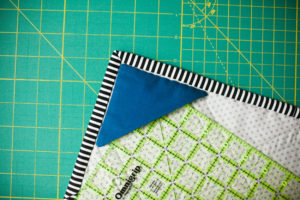
If you have entered a quilt into the BoulderMQG 2018 show, An Exploration in Sustainable Modern Quilting, then you will need to be sure that any accepted quilt(s) include the correct attachments for hanging. The following is a tutorial for creating and adding corner triangles to small quilts. For our show, any quilt measuring 30” wide or less will require corner triangles. If these triangles are not added to your accepted entry we may use other means to hang and display the quilt, such as safety pins or Command adhesive. Below we provide instructions for both adding corner triangles before or after binding or facing your quilt.

Adding Corner Triangles Before Binding

Method shown for hand finished binding.

Step 1

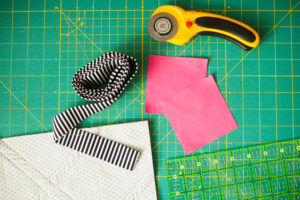
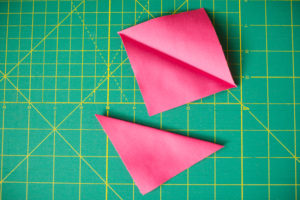
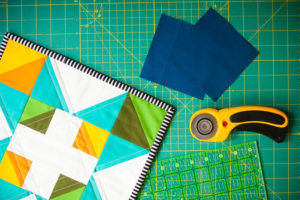
Gather supplies; quilt ready to bind, prepared binding, (2) 3.5” squares to make corner triangles.


Step 2

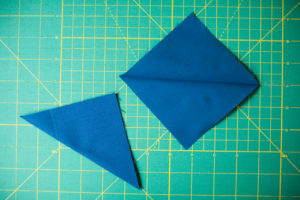
Press squares diagonally; RIGHT SIDES OUT.

Step 3

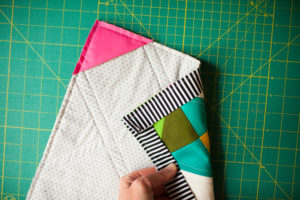
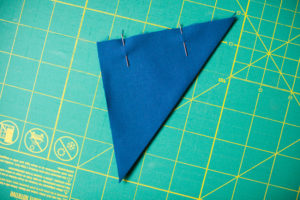
Pin triangles on back side of quilt at TOP corners.


Step 4

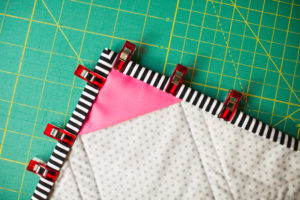
Sew binding on to front side of quilt as you normally would. Take care not to sew over pins on corner triangles.

Your binding will look normal on the front. The back will have your corner triangles secured by the machine stitching.


Step 5

Clip, or pin, binding to prepare for hand stitching it down.

Step 6

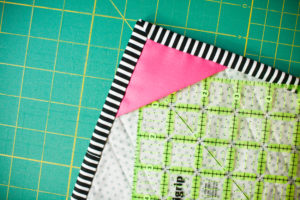
Hand sew binding down all the way around. Take care to go through 3 layers (2 layers of corner triangle, plus quilt backing fabric) when stitching at corner triangles.


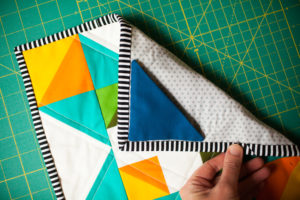
Your finished corner triangles will create small pockets that will be used to help us hang your quilt should it be accepted to the show.

Adding Corner Triangles After Binding (or for faced quilts)


Step 1

Gather supplies; finished and bound quilt, (2) 4.5” squares.


Step 2

Press squares diagonally; RIGHT SIDES TOGETHER.

Step 3

Keeping right sides together, pin approximately 2” apart along one raw edge side. This will be where you leave an opening for turning right sides out.


Step 4

Sew along raw edges ¼” seam, leaving area between pins open. Clip all corners.

Step 5

Turn right sides out. Press. Take care to fold in raw edges at opening.


Step 6

Pin in place on TOP corners of quilt. When applying to a traditionally bound quilt, match edges just inside edge of binding. When applying to a faced quilt, depending on the width of the facing, you may need to overlap the facing. Take care to keep away from quilt edges in order to not show on the front.

Step 7

Hand stitch along the edges of the corner triangle that run parallel with the quilt edges. Take care to stitch through all layers (quilt backing, plus all layers of corner triangle) at the opening used to turn the corner triangle.


Your finished corner triangles will create small pockets that will be used to help us hang your quilt should it be accepted to the show.

Submissions for An Exploration in Sustainable Modern Quilting will be accepted through September 1, 2018. If your quilt is larger than 30″ it will need a hanging sleeve, that tutorial will be posted in the coming weeks. 

Introducing Stephanie Ruyle – Guest Juror

Introducing Stephanie Ruyle – Guest Juror

An Exploration in Sustainable Modern Quilting is a a juried gallery show from the Boulder Modern Quilt Guild and the Sustainability, Energy and Environment Community at University of Colorado Boulder. The vision for An Exploration in Sustainable Modern Quilting is to challenge quilters and our community to view and interpret what a modern quilt is and apply sustainable, environmentally friendly, materials and practices to create a functional quilt. 

The Boulder MQG is thrilled to have Stephanie Ruyle as a guest juror and today we are introducing you to her and her amazing work. Stephanie blogs at Spontaneous Threads and creates many quilts with sustainable fabrics. We asked her to share with us how she got started with sustainable quilting, here’s what she told us:

Part of the process leading up to the show is to reflect upon and think about sustainable quilting practices as well as to put together some of these thoughts and share some ideas for sustainable quilting/creating. 

 
This discussion dovetails nicely with a discussion started, and continued by Scarlet Kumquat  and others, about the waste generated by quilters, here in the US and abroad in the textile factories that manufacture the fabrics we use to make our quilts and our clothing. 

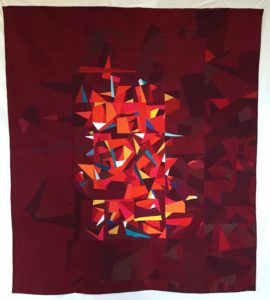
Coming to quilting from garment sewing, I have been keenly aware of the fabric waste in garment sewing and have for many years devised my own pattern hacks to keep the amount of yardage used in the construction of a garment to a minimum. I have also done that with quilting, creating one of my best known quilts, “Embers”, entirely from the scrap waste of 2 other quilts. Recently I have challenged myself to be thoughtful with all the sewing that I do. It is quite fulfilling to find only selvedges remaining at the end of a project, and even those do not go unused. 
 
 “My thoughts on Sustainable Modern Quilting” highlights some additional ways in which we can all contribute to this timely and important discussion.  If we make it a priority to take time to consider and plan for the “life” of our creations, even when just practicing new skills, we can make a huge and impactful difference.”
Make sure to head over to Spontaneous Threads to Read Stephanie’s thoughts on Modern Sustainable Quilting. And follow her over at Instagram.

Experiences Quilting with Men’s Dress Shirts – A Sustainable Approach to Quilting

Experiences Quilting with Men’s Dress Shirts – A Sustainable Approach to Quilting

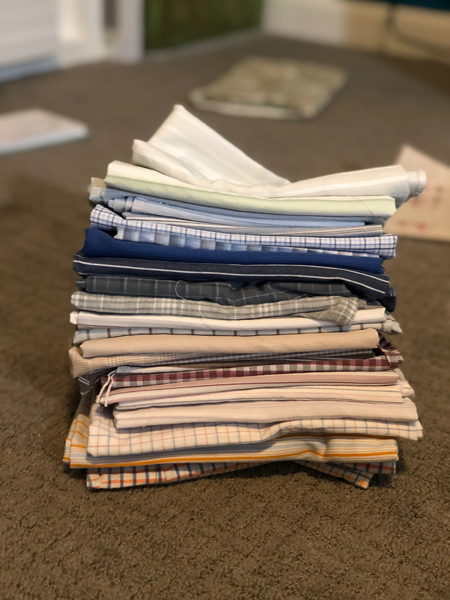
by Katie Arrington Although I have always loved the idea of T-shirt quilts, I do not love sewing with knits.  And if I don’t love sewing with knits, I always figured I would hate quilting with knits.  How could I go about using old clothes without having to sew with knits?  My husband and I have been together since 2003, our senior years of college, and ever since he got his first “real” job, he’s had to wear a button up shirt to work every day.  Some of these shirts hold real memories for me- ones I bought for special occasions, ones worn on some of our pre-kid adventures, and ones I just loved to see him in.  Every year he goes through his shirts and purges, and I, more or less, keep all of them to be used in the future.  I wanted to make quilts from these old worn shirts so that we could all lay under them and feel wrapped in love by him and the memories from the shirts.  I also figured if I could figure it out with mens work shirts, then maybe in the future I could make quilts with the best loved clothing of my children.
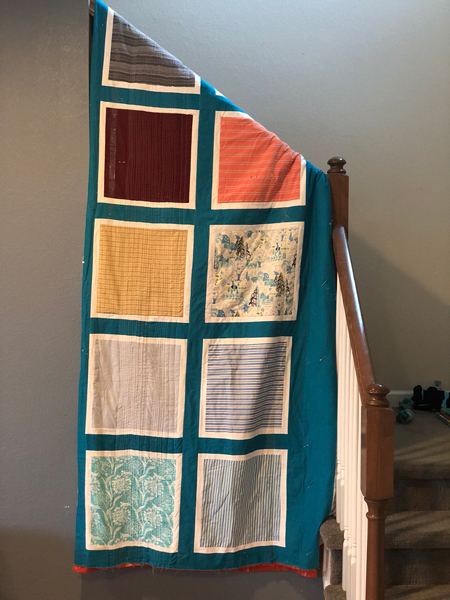
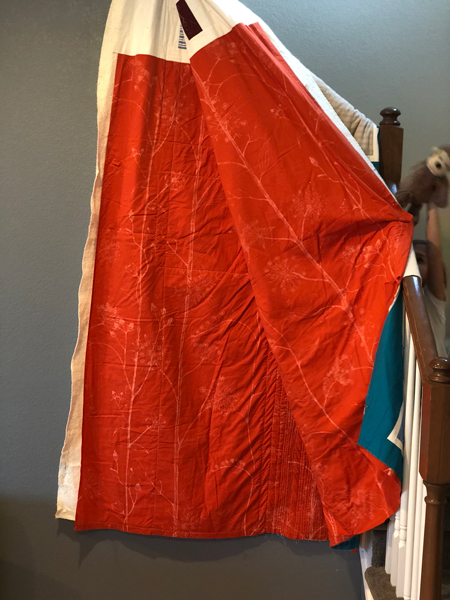
I started the first quilt with his shirts at the first retreat of the Los Angeles Modern Quilt Guild, in 2011. I went to retreat with a 6 week old baby and my brain could only work in simple designs. I was thrilled to leave retreat with the finished top.  I made big squares with his shirts, and one each from my dad and uncle thrown in, mixed in with a few of my favorite fabrics at the time.  It’s simple and clean and highlights the pattern of each shirt. Framing each big block in white helped highlight the different shirt patterns.  I sashed everything in aqua, which tends to be a recurrent favorite color of mine in quilting. For the back I used a vintage sheet my mother-in-law gave me because she knew I loved it and would put it to use.  Clearly, it is a work in progress/UFO. I started quilting it and hated what I had done. So, I am slowly picking it all out.  The overall layout of this quilt is a great way to simply and cohesively make a quilt from mostly woven shirts or pieces of clothing. This is going to be my main quilt project to tackle in the first part of 2018.
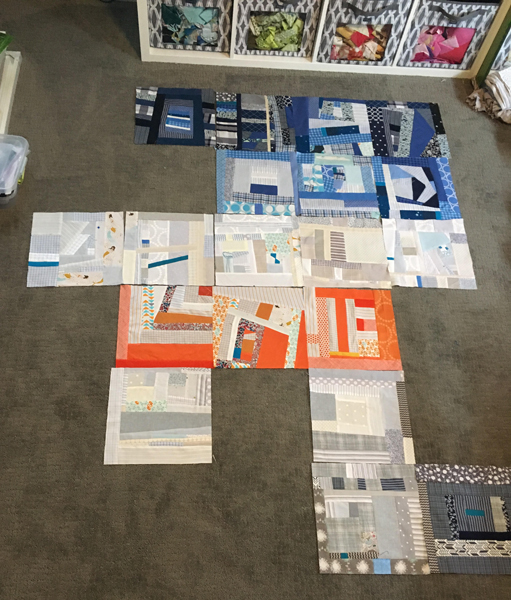
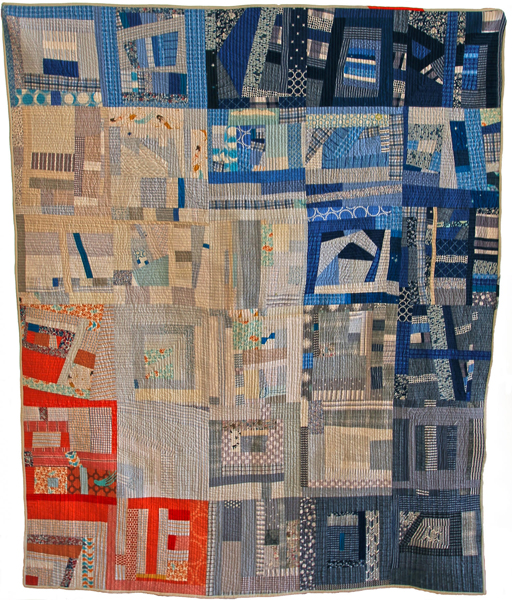
Since 2011 I acquired another hefty stack of my husband’s work shirts.  I wanted to be more creative for my second try at a quilt with his shirts.  I decided that I would make all improv blocks, that would aim to be at least 50% made up with his shirts (which was only semi-successful).  Every block in the quilt is different and incorporates some of my favorite fabrics next to pieces from his shirts.  It was hard to get to the 50% ratio so some blocks have a lot less than that, especially the low volume ones.  I love improv. This quilt was a joy to make.  I started 2 dark blue, light blue, low volume and orange blocks and built everything out from there.  I played around with the layout for the quilt a lot and in a comment on instagram it was suggested to add more of the pop of the color orange, so I did.  In addition to some of my favorite fabrics I put some pieces in to represent my kids, mermaids and the millennium falcon.  Straight line quilting is not my favorite thing to do, but this quilt called for it. So, that’s what I did along with some crosshatching towards the middle.  When I gave up the idea of having the lines be perfect and perfectly spaced, I had much more fun with it.  So it’s really organic straight line quilting.
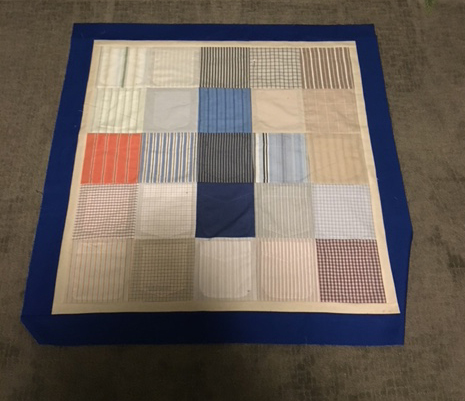
There were so many fun left over bits and pieces that I didn’t want to part with.  Namely the pockets and the cuffs of the shirts, neither would have worked very well in an all over quilted quilt.  With all of the leftover pockets I was able to make my son a minky backed small quilt, which he loves sleeping under, and I imagine will be filled with cars and rocks at some point.
It’s hard at first to cut up old pieces of well loved clothing. But after that initial first cut, everything is easier. When I was starting both quilts I cut off the big back panel of the shirts, cut off the pocket from the front, cut the largest pieces I could from the sleeves and front pieces, and saved the cuffs.  Then I had a stack of nicely sized pieces to cut into large squares for the first quilt, or into smaller improv pieces for the 2nd quilt.  I love improv blocks and improv quilts and I really enjoyed mixing the dress shirts in with solids and some of my favorite quilting cottons.  None of the quilting cottons were washed ahead of time, and the mix of pre washed and not pre washed didn’t seem to affect the final quilt. Quilts with old clothing could be made in memory of someone who has passed or to be wrapped up in love and memories of someone still alive.  You could mix pieces from many members of a family, including everyone’s memories in the quilt.  If you don’t have enough shirts or items of clothing for a whole quilt, you could go to a thrift store and find additional items that complement and contrast what you have at home. Have you ever made a quilt from clothes?  We’d love to see if you have: comment below or tag us on Instagram @bouldermqg We also have a Sustainable Quilts board on Pinterest full of inspiration!

Sourcing Reclaimed Fabric

Sourcing Reclaimed Fabric

By Shelly Sommer

One of most sustainable ways to quilt is to pull fabric from the waste stream for your projects.  Reclaiming fabrics gives them a second life, saving them from the landfill and making new use of the energy and resources already embodied in the material.  It also gives you unique materials to play with and saves you cash.  Are you interested in trying out some reclaimed fabric in your projects?  Try browsing through some of these insider tips to get started.
Thrift Stores

Chain thrift stores are the easiest, most reliable places to find clothing you can convert into quilting fabric.  They not only have gazillions of items to choose from, they always have certain types of garments that convert easily into quilting material, like men’s shirts and jeans.  Smaller, independent thrift shops generally have less selection but may support a cause close to your heart—they can (sometimes) also be better curated.  You’re bound to find something suitable for your project at a thrift shop.  Some serendipity is still involved, though – you need an open mind and a little luck.  

  • To make the best decisions, be prepared.  Take a list of projects, and bring swatches if you’re trying to coordinate with fabric you already have.  The hunt is half the fun, but knowing the parameters for what you want can help you sort through the welter of choice.
  • Look for sale days.  Most thrift store chains have occasional half price days, which mean you pay a lot less for 6 yards’ worth of blue cotton shirts.
  • Ease into reclaiming fabric by starting with men’s button-down shirts.  Most are made from high-quality woven cotton that behaves like quilting cotton but has a softer feel.  Men’s shirts have no darts to contend with and come with lots of fabric in the backs and sleeves.  You’ll get 1-2 yards of fabric from each shirt, depending on its size and cut.  They come in gorgeous solids, often with a slight shot cotton appearance; narrow stripes are also abundant.
  • As you get more adventurous, move into the women’s section to find a huge variety of fibers, textures, colors, and prints.  Quality see-saws wildly between items; look for good-quality fabric that will last.  Your best bets for large amounts of fabric are longer garments without much tailoring: think shift dresses, maxi skirts, and larger pairs of jeans.  If you love the fabric, but it’s a small garment with lots of boning, darts, and a lining, for example, it might or might not be worth the extra work to deconstruct.  Decide whether it’s worth your time for the size pieces you’ll get.
  • Things are in the thrift store for a reason, and sometimes that reason is wear.  Take a close look at the garment and try holding it up to the light to see any weak spots.  On men’s shirts, wear appears first on the cuffs and collar (which you don’t care about) and the fabric at the elbows (which you might).  I like to use shirts with worn elbows, since I think they probably won’t be sold otherwise; but it gives me a little less fabric to work with.
  • A lot of modern fabrics, especially in women’s clothing, have a little Spandex in them.  The stretch makes them easier to wear, but harder to quilt with since they tend to move under pins or between your fingers.  Use them, absolutely: just be careful not to stretch your pieces, use a pin or two, and leave some extra seam allowance in case you need it (you can always trim your blocks down later).  Test the fabric by pulling it between your fingers to see what you’re in for.
  • Don’t forget to check the linens section of the store.  Occasionally, within the brangle of worn sheets and mismatched towels, you’ll see a fantastic vintage tablecloth or like-new linen duvet cover that will give you a lot of good yardage.

Local thrift stores include:

Creative Reuse Centers

Creative reuse centers are thrift shops that specialize in art and craft materials. Most have a broad spectrum of materials for every craft you can imagine, though in some parts of the country you can find stores that focus entirely on sewing.  Creative reuse centers are great places to find fabric donated by sewists or their estates: yardage, remnants, bolts, and rolls.
  • Creative reuse centers are reliable sources of quilting cotton and similar fabrics.  The selection can be a wild assortment of fibers and decades and you can’t count on finding particular modern prints or colors.  But bring an open eye and open mind and you could unearth some gems.
  • They sometimes have tools, sewing machines, or sergers on offer as well as supplies – these go fast but can net you, for instance, an old Bernina or a used quilting table for a modest cost.
  • Keep an eye on their media feeds for special sales, like when they get a huge donation of fabric from a quilter’s estate.  Occasionally they have half price or “by the pound” sales where you can grab silk scarves, linen drapes, and lamé scraps in one treasure-filled shopping bag.

Local stores include:

Garage and Estate Sales

More chaotic and less reliable than thrift shops, these personal sales are hit or miss.  But if you find a destashing sewist at home you can find treasure.  Garage and especially estate sales are good places to luck into vintage linens.  Look for embroidered table linens, damask items, hostess aprons, dresser scarves, table runners, and vintage handkerchiefs.

  • The richer the neighborhood, the more likely the sale is to have high-quality items.  There are exceptions to that rule, of course.
  • Craigslist and the local paper can be good places to scan for sales ahead of time and look for any that mention fabric.
  • Prices can be negotiable, depending on the preferences and exasperation level of the person running the sale.  If you are taking a large quantity of material, that can be reflected in the price.
  • Check fabric for quality, weak spots, and stains by unfolding it, looking it over carefully, and holding it up to the light.  You may be able to clean the piece or work around any flaws, but you should know what you’re getting.

Your Own Closet

Americans discard an average of 80 pounds of clothes per year.  80 pounds.  Have you tried lifting 80 pounds?  It’s a lot.  Very little is reused or recycled.  Change those numbers for you by folding some of your tired clothing into quilt material.  Quilting is also a great way to reuse those fast fashion pieces that snuck into the house, then shrank or fell apart after their first wash and can’t be donated.

  • Before you discard a piece of clothing, look at it with fresh eyes as potential quilting material.  Does it have a soft texture, color you love, or interesting detail you might keep?  Would a shirt pocket be just the thing to stitch onto a quilt to hold your child’s most beloved Lego figure?  Could those worn-out sweatshirts become batting?  The more you conduct this exercise, the more creative connections you will make.
  • Denim achieves the perfect texture a few moments before it falls apart.  Cherish the soft, varigated colors and textures of worn out jeans by making a denim quilt or rug showcasing its wabi sabi perfection.
  • Old sweaters make cuddly pillow covers or throws.
  • Don’t be afraid of combining textures and fibers in your work.  Piecing velveteen, fuzzy sweater knit, and courduroy together can give you a fabulous collage of texture.  Just watch out for combining very light with very heavy fabric (rayon and denim, for example) unless you reinforce the flimsier fabric somehow.

Will you try using some reclaimed fabric in your quilts?  We’d love to see what you do and how it goes: comment below or tag us on Instagram @bouldermqg We also have a Sustainable Quilts board on Pinterest full of inspiration!