
By Laura Loewen
If you have entered a quilt into the BoulderMQG 2018 show, An Exploration in Sustainable Modern Quilting, then you will need to be sure that any accepted quilt(s) include the correct attachments for hanging. The following is a tutorial for creating and adding corner triangles to small quilts. For our show, any quilt measuring 30” wide or less will require corner triangles. If these triangles are not added to your accepted entry we may use other means to hang and display the quilt, such as safety pins or Command adhesive. Below we provide instructions for both adding corner triangles before or after binding or facing your quilt.
Adding Corner Triangles Before Binding
Method shown for hand finished binding.

Step 1
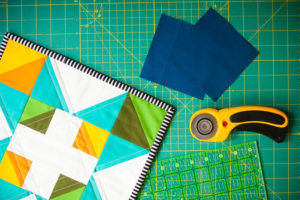
Gather supplies; quilt ready to bind, prepared binding, (2) 3.5” squares to make corner triangles.
Step 2
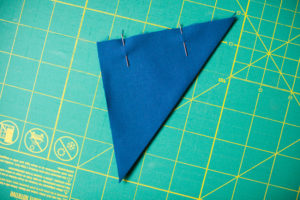
Press squares diagonally; RIGHT SIDES OUT.

Step 3
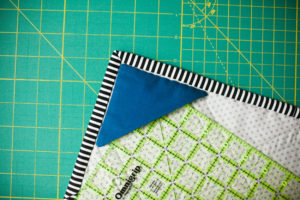
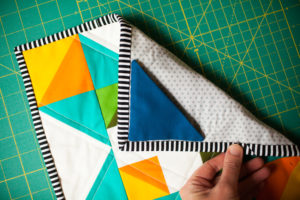
Pin triangles on back side of quilt at TOP corners.


Step 4
Sew binding on to front side of quilt as you normally would. Take care not to sew over pins on corner triangles.

Your binding will look normal on the front. The back will have your corner triangles secured by the machine stitching.
Step 5
Clip, or pin, binding to prepare for hand stitching it down.

Step 6
Hand sew binding down all the way around. Take care to go through 3 layers (2 layers of corner triangle, plus quilt backing fabric) when stitching at corner triangles.
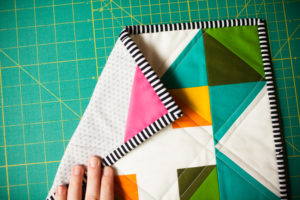
Your finished corner triangles will create small pockets that will be used to help us hang your quilt should it be accepted to the show.
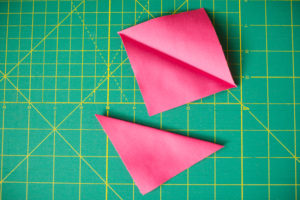
Adding Corner Triangles After Binding (or for faced quilts)
Step 1
Gather supplies; finished and bound quilt, (2) 4.5” squares.

Step 2
Press squares diagonally; RIGHT SIDES TOGETHER.
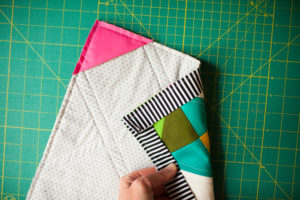
Step 3
Keeping right sides together, pin approximately 2” apart along one raw edge side. This will be where you leave an opening for turning right sides out.

Step 4
Sew along raw edges ¼” seam, leaving area between pins open. Clip all corners.

Step 5
Turn right sides out. Press. Take care to fold in raw edges at opening.

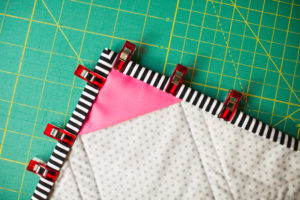
Step 6
Pin in place on TOP corners of quilt. When applying to a traditionally bound quilt, match edges just inside edge of binding. When applying to a faced quilt, depending on the width of the facing, you may need to overlap the facing. Take care to keep away from quilt edges in order to not show on the front.

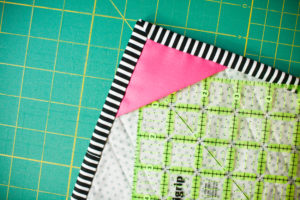
Step 7
Hand stitch along the edges of the corner triangle that run parallel with the quilt edges. Take care to stitch through all layers (quilt backing, plus all layers of corner triangle) at the opening used to turn the corner triangle.
Your finished corner triangles will create small pockets that will be used to help us hang your quilt should it be accepted to the show.
Submissions for An Exploration in Sustainable Modern Quilting will be accepted through September 1, 2018. If your quilt is larger than 30″ it will need a hanging sleeve, that tutorial will be posted in the coming weeks.
