Aug 31, 2020 | 2020 Block of the Month, Tutorial
By Cara Cansler
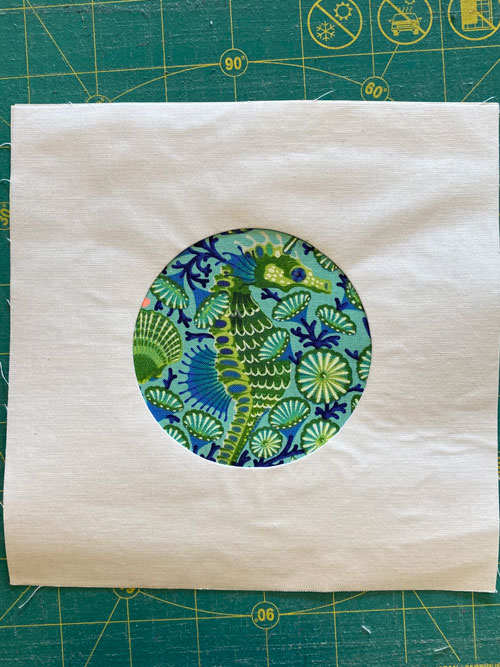
Inset Circle Supplies
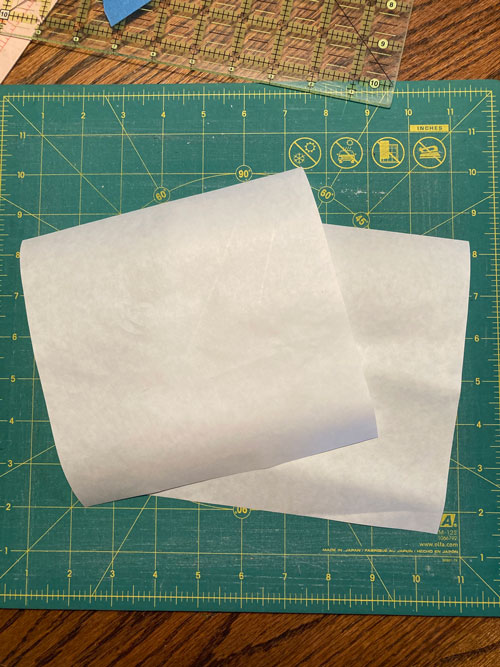
6 ½” square of background material
5” square of circle material
Freezer Paper
Stick Glue
Compass or a circle cutter
Quilting ruler, thread, zipper foot, sewing machine
Inset Circle Instructions
For the BOM we’ll make 3 sizes of inset circles, but for the tutorial we’ll be making 1 circle in square block.
Step 1 – Make Templates
Cut 2 – 6 ½” squares of Freezer Paper. Notice there’s a shiny side and a paper side of the paper. The shiny side will stick to fabric when ironed on a cotton fabric.
I placed the 2 sheets of freezer paper on top of a piece of fabric with both sheet’s shiny side towards the fabric. Use fabric so the paper doesn’t stick to the ironing board.
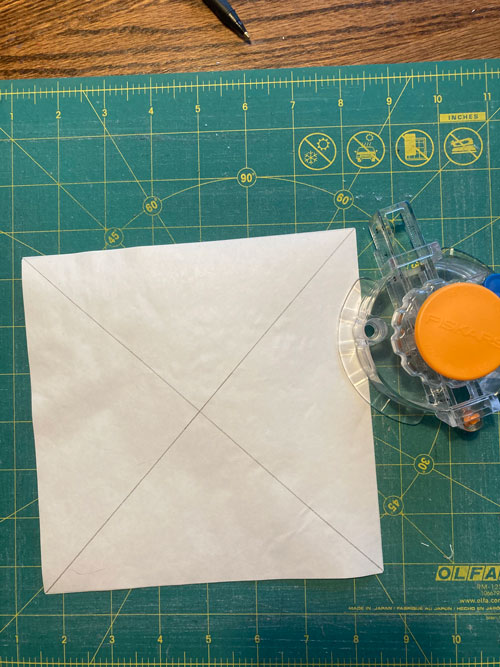
Draw lines diagonally to find the center of the square. Use a compass or a circle cutter to cut out a 3 ½” circle in the middle of the template.
Step 2 – Make Inset Circles
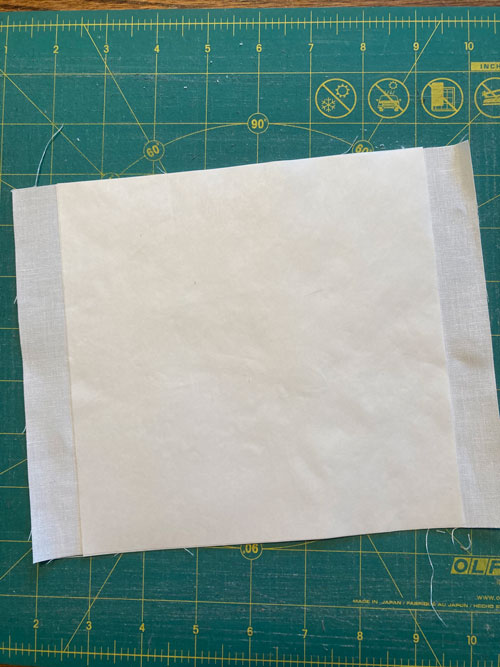
Iron 6 ½” freezer paper with the shiny side to the back side of your background fabric.
Cut out the center of the circle leaving about ½” of fabric from the template. Clip the seam allowance but stop at ⅛” from the template.
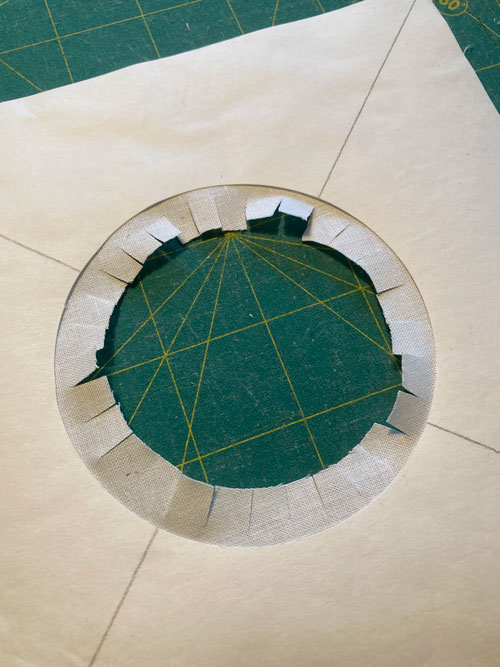
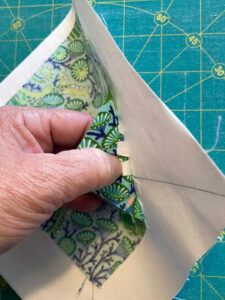
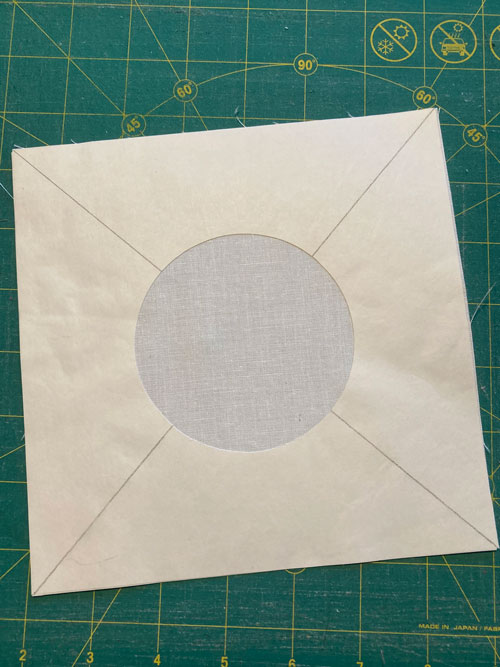
Lightly apply glue to the paper template and fold the background fabric around the inner circle so the glue holds the fabric. It may be helpful to do a couple of inches at a time.
Check the smoothness of the circle. If there are any edges that aren’t smooth enough, peel back the seam allowance and re-glue.
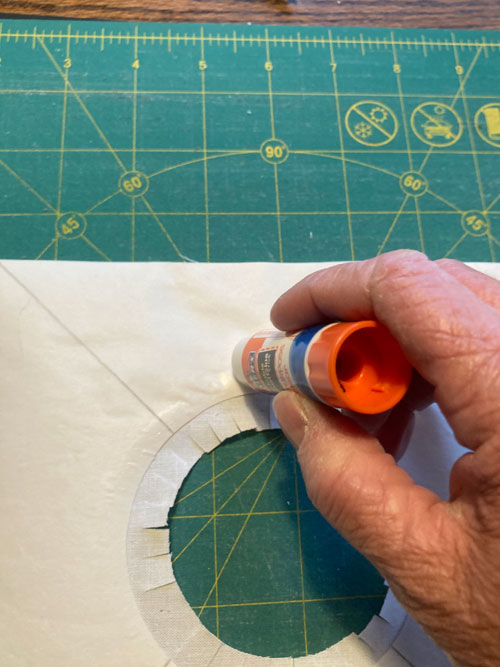
To attach the circle fabric, apply glue to the clipped seam allowance.
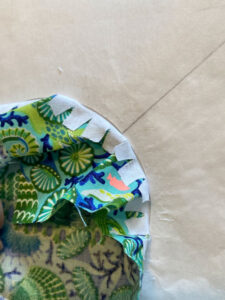
Place the circle fabric, right side down, over the glued area. Iron dry.

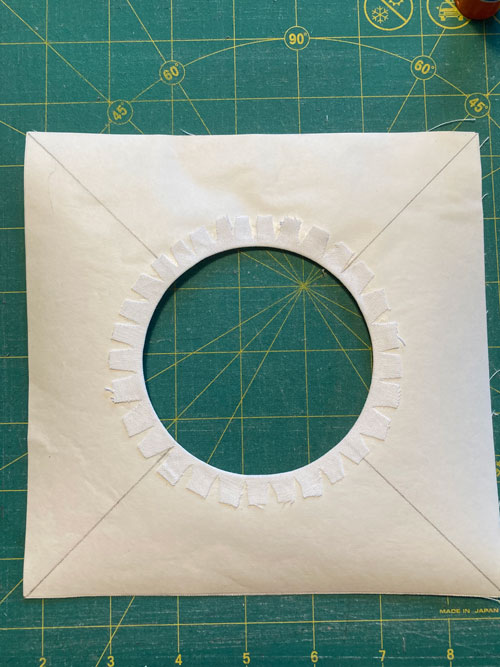
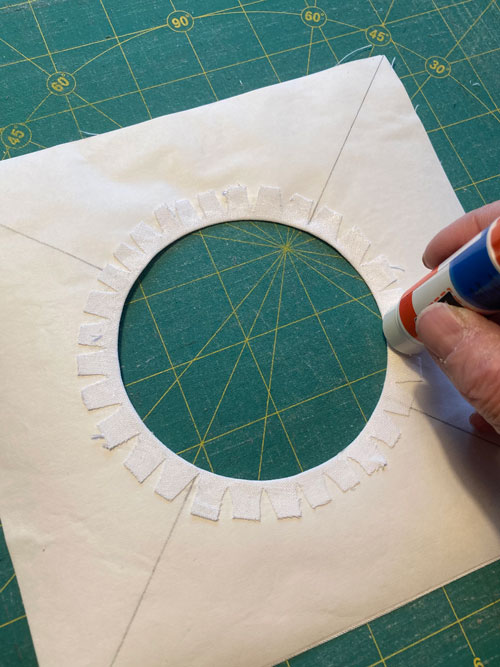
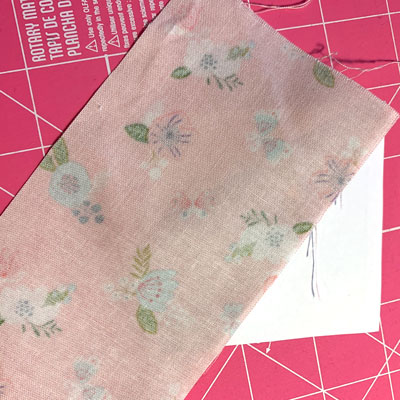
Carefully peel the background fabric away from the paper. Re-glue any spots of circle fabric that have come apart from the clipped seam allowance.
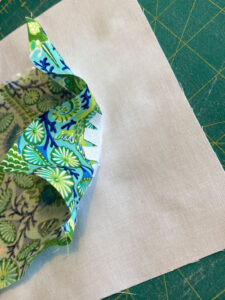
Carefully remove the Freezer Paper.
Step 3 – Sew Circle
Stitch in the crease with a zipper foot. If your stitching isn’t smooth, stitch over any uneven seams.
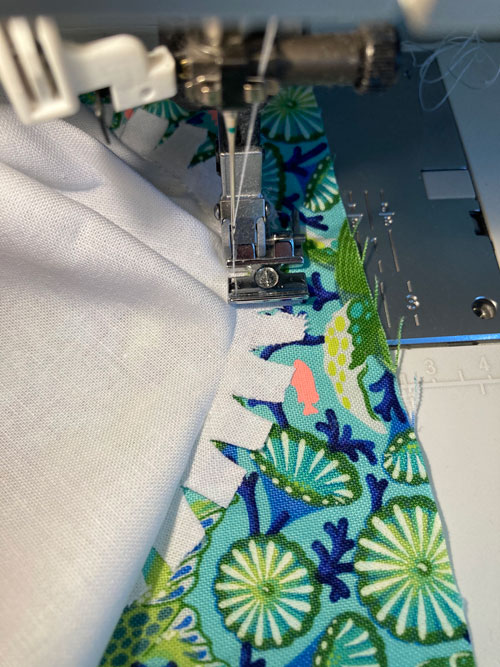
Trim the circle fabric, leaving about ¼” seam allowance.
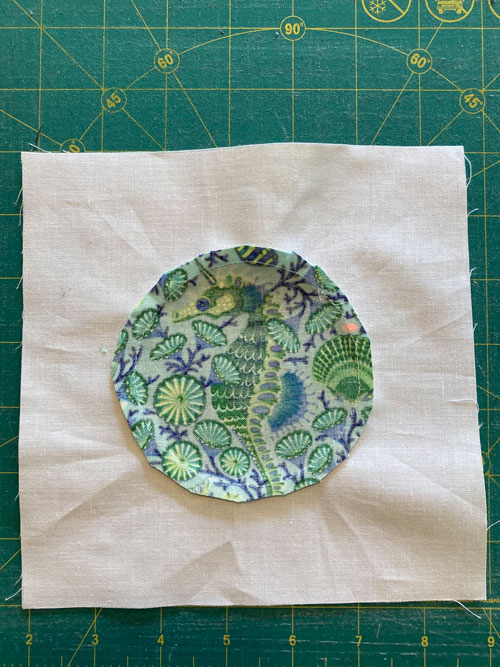
Step 4 – Press
By pressing the circle fabric with the seam allowance out, you achieve a pieced look. If you press the seam in, you’ll get an applique look.
Aug 3, 2020 | 2020 Block of the Month, Tutorial
By Karla Haynes
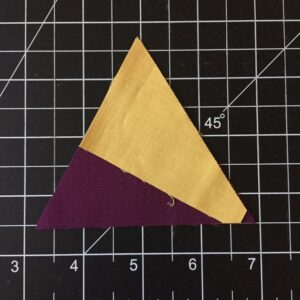
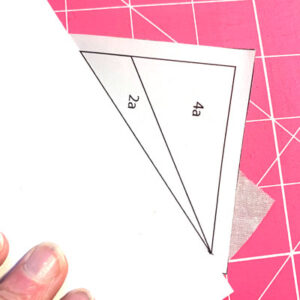
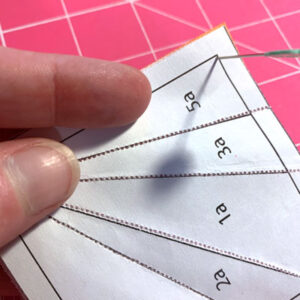
Making the Triangles
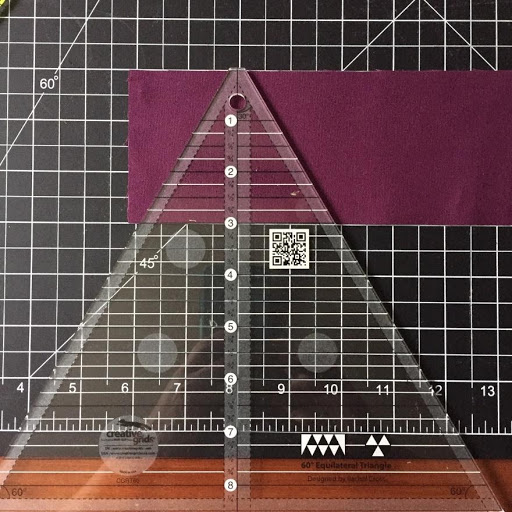
Method One – 60° Equilateral Triangle Ruler
I am using 60° equilateral triangle ruler by Creative Grids. I like this one because it has a center line to cut your outside pieces easily. It is a good investment if you like making triangles like I do, but is not needed if you are just going to make this one block!
Step 1
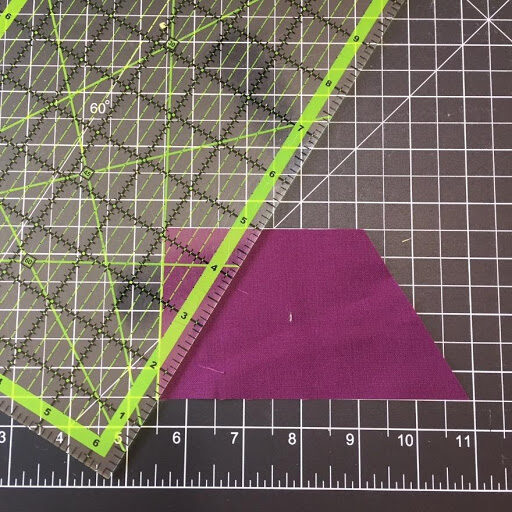
Lay your ruler over the top of the square, lining up the top of the triangle (flat edge) and the bottom of the square with the numbered line corresponding to the height of the block. For example, for the 3 x 4 in rectangle, you will align it on the 3 in line as in the photo below.
Step 2
Cut along both sides of the ruler to create your triangle. It will have a blunt top edge.
Step 3
For the outside pieces, fold your rectangle in half, and align the raw edges with the line to the left of the center line.
Step 4
Cut along the edge of the ruler, trimming the tiny corner off the opposite side.
Step 5
You will now have 3 triangle pieces. Fold down the outside piece and align the clipped edge with the bottom edge of the triangle.
Step 6
Sew a .25 in seam along the triangle edge. Press seams open. Align the second triangle edge in the same manner. Stitch a .25 inch seam along the opposite edge. Press open.
Step 7
Trim triangles according to the instructions below.
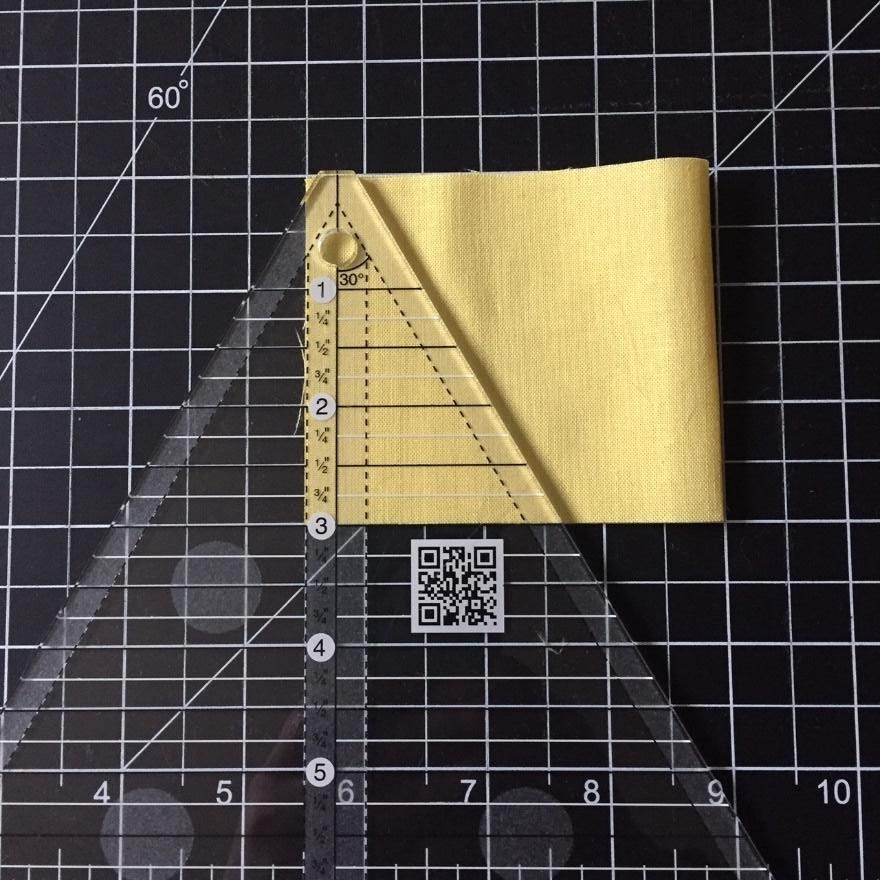
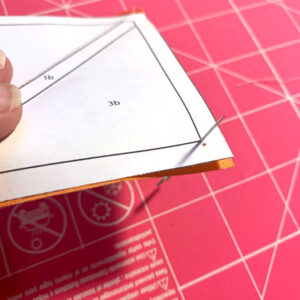
Method Two – Standard Quilting Ruler
This is a longer, more time-consuming method, but you can make this work just as well without any special tools.
Step 1
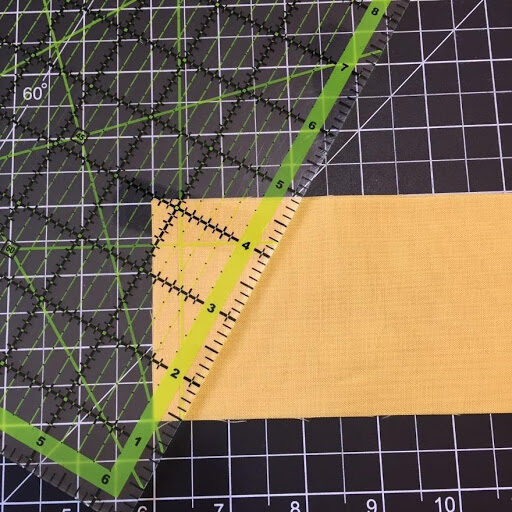
To cut the inside of the triangle, identify the 30° angle on your ruler and line up the edge of the ruler line it up with the edge of the square as in the photo below. The end of the line should meet the corner of your square. Cut along the ruler edge.
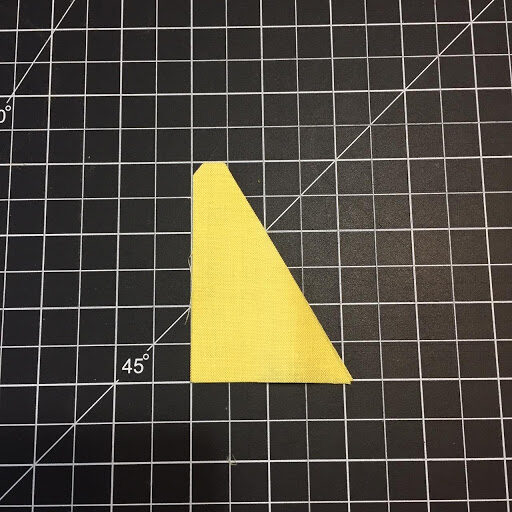
Step 2
Flip the fabric over and align the bottom of the 30° line with the bottom of the fabric. Ensure that you have a .25 in long flat edge along the top of your triangle by positioning your ruler as in the photo below. Cut the fabric along the edge of the ruler.

Step 3
Cut the triangle background. On the short side of the fabric strip, mark a line on the back of your fabric 3/8 inches from the edge.
Step 4
Fold the strip in half, right sides together, with the marked side visible on top. Align your 30° ruler line along the marked line, with the bottom of the ruler touching the bottom edge of the fabric. Trim along the edge of the ruler.
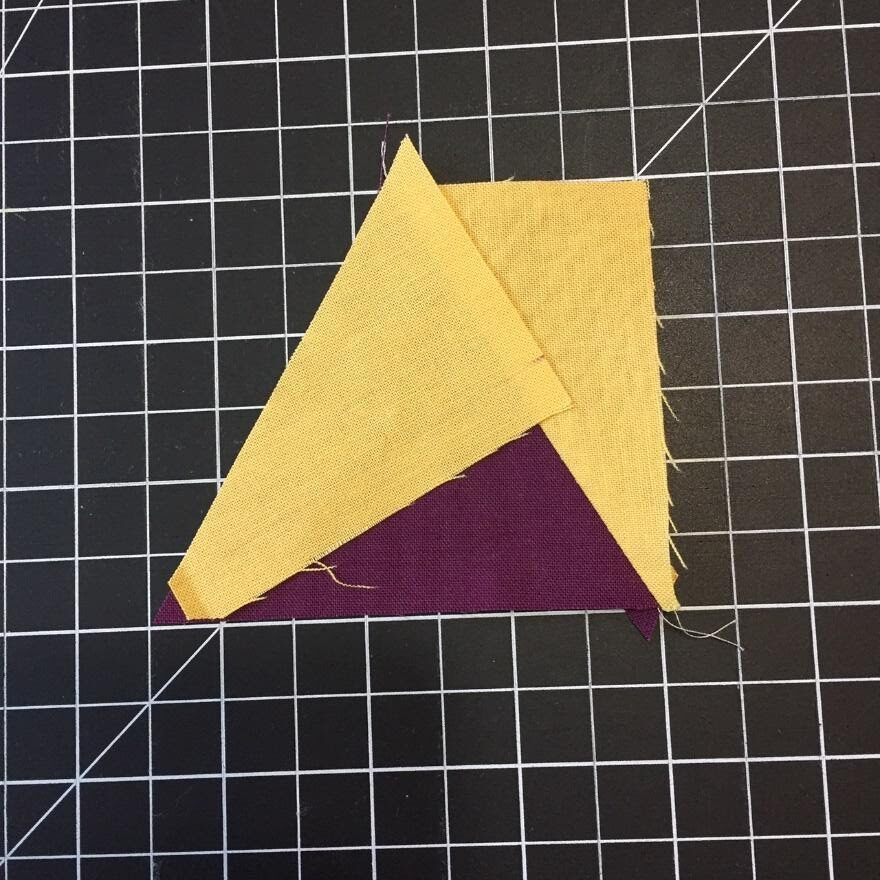
Step 5
You will now have 3 triangle pieces. To assemble the triangles, line up the short side of the triangle outside with the triangle inside. The edges of the pieces should align, leaving a .25” ear at the top and bottom of the triangle. There will also be a small ear below the triangle bottom edge.
Step 6
Stitch a .25” seam and press open. Line up the other side, again leaving a .25” ear at the top. The ears of the background pieces will align and overlap. Stitch .25” seam and press open.
Step 7
Trim triangles according to the instructions below.
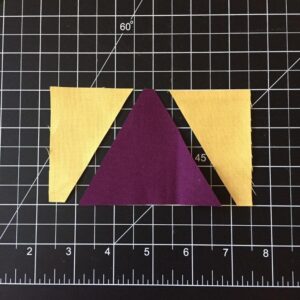
Trimming the Triangles
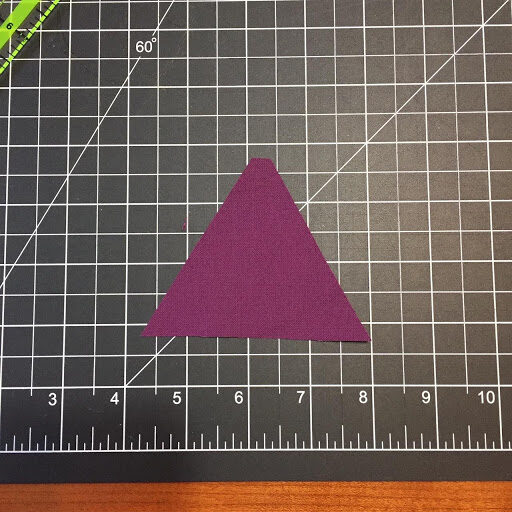
The triangle pieces will be a bit large. Trim the top and bottom of the triangle first. Make sure that there is a .25 in seam allowance above the top point of your triangle and trim the bottom edge second.
Step 1
To trim the sides, line up the tip of the triangle along the center measurement of your triangle block and trim each side individually. For example, line up the 3 in wide triangle tip with the 1.5 in measurement to trim each side.
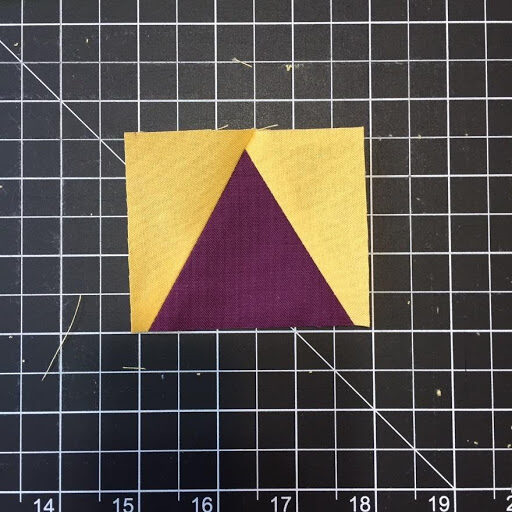
Your triangles will look like this when complete!
Jul 14, 2020 | 2020 Block of the Month, Tutorial
From Barb Gippe’s April 2018 Evening Presentation. The full version with additional tips and information is available in the Member’s Area.
Foundation Paper Piecing Supplies
Ruler
Rotary cutter
Cardstock or index card
Flat head pins or glue stick
Fabric, thread, sewing machine
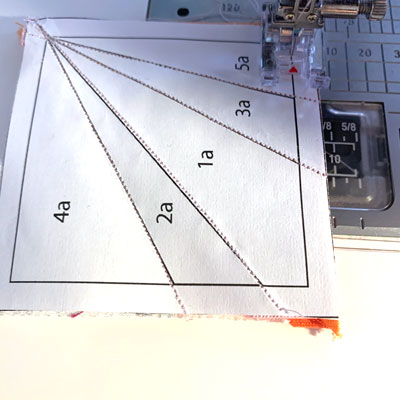
Foundation Paper Piecing Instructions
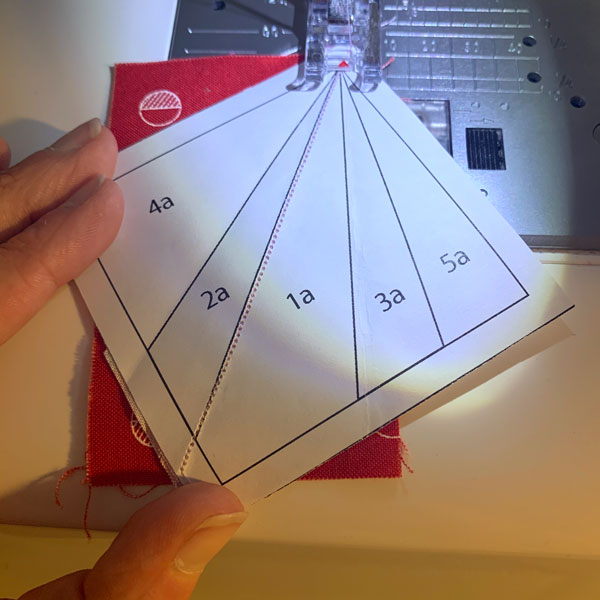
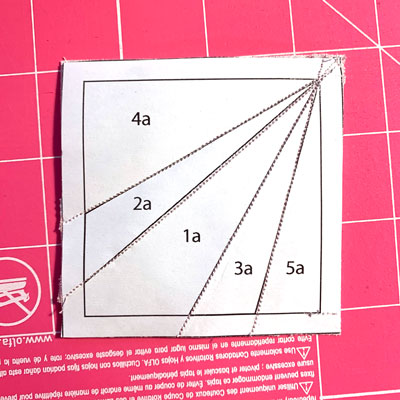
You will sew the pattern in number order. Begin by taking the first fabric and attaching it to the unprinted side of the paper with either a flat head pin or glue stick. Ensure that the entire piece is covered, (in this case, section 1) including an additional 1/4″ margin.
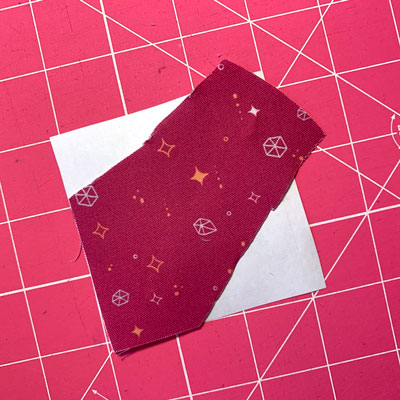
Place your card stock or index card along the printed line on the pattern you will be sewing (in this case you will be sewing on the line between sections 1 and 2) and fold over the printed paper (printed sides together). Use your rotary cutter to trim the fabric 1/4″ from the edge of your paper.
Set fabric 2 on top of fabric 1, right sides together at the trimmed edge of fabric 1.
Make sure you have the fabric in the correct location. Test this by putting a pin in the two fabrics at a 1/4″ and flipping the fabric over as if it has been sewn. Make sure that fabric 2 covers all edges of the pattern, keeping in mind the 1/4″ margin.
Make sure your machine is set for a shorter stitch length and you have a 90/14 needle in.

Set your pattern on your machine, printed side up, ready to sew on the line between the two sections (in this case, you’ll be sewing on the line between 1 and 2.) Remember to sew 1 or 2 stitches before and after the line.
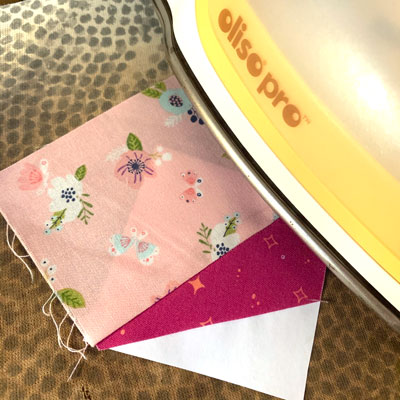
Open and press the right side of the fabrics.
Continue the same way with each new piece of fabric, sewing them in numerical order.
Tips For Joining Multiple Pieces
Some foundation paper piecing patterns are made up of multiple pieces that need to be joined together, this is the case with the July BOM block.
Take the two pieces you will be joining and place them right sides together. Take a pin and stick it through the corner of one piece through the other other piece’s corner.
-
-
Pin goes through one pattern piece
-
-
Pin comes through the other pattern piece
If necessary, reposition the pin until it is straight. When you begin sewing the pieces together, this ensures your pieces will join correctly.
Sew the pieces together along the edge line, or just use a 1/4″ seam.
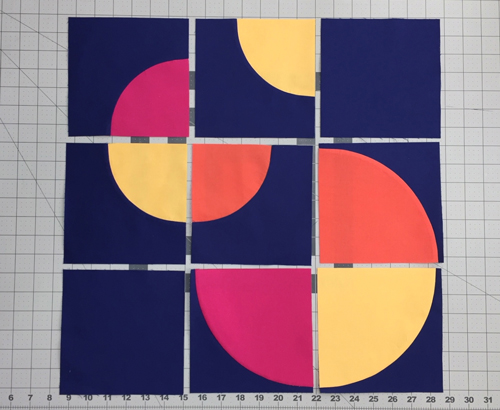
May 2, 2020 | 2020 Block of the Month, Tutorial

By Rebecca Greco
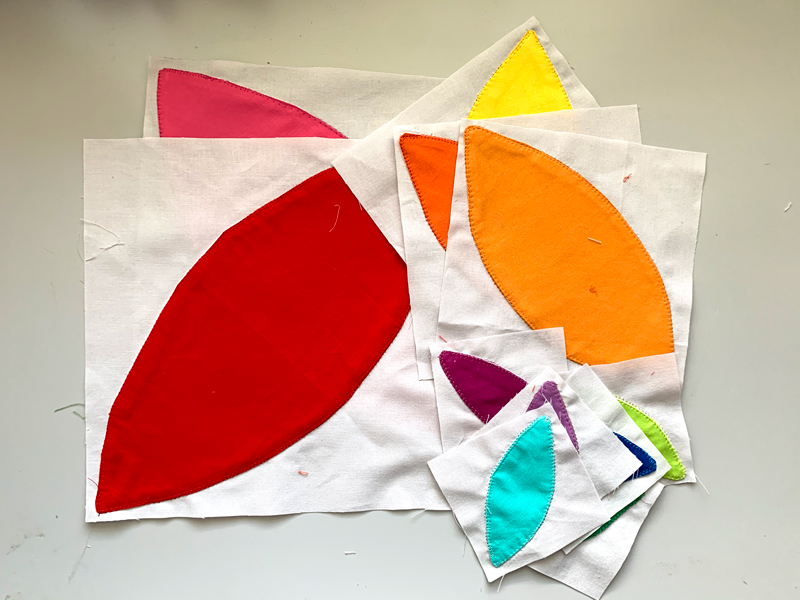
This month’s BOM uses a variety of sizes of orange peel blocks to create a modern take on a traditional block. This block uses applique and can be done by hand or machine, whichever you prefer.
CUTTING INSTRUCTIONS
Fabric A – background
Cut (6) 4.5″ squares (trim to 3.5″)
Cut (3) 7.5″ squares (trim to 6.5″)
Cut (2) 10.5″ squares (trim to 9.5″)
Fabric B – large orange peel
Cut (2) from template 1
Fabric C – medium orange peel
Cut (3) from template 2
Fabric D – small orange peel
Cut (6) from template 3
BLOCK INSTRUCTIONS
Step 1 – Prepare Orange Peel Units
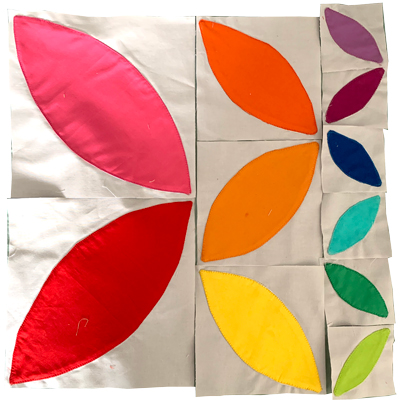
Using the orange peel applique tutorial, make 2 large 9.5″ orange peel blocks, 3 medium 6.5″ orange peel blocks, and 6 small 3.5″ orange peel blocks.
Step 2 – Layout Block
Layout the block as shown below.
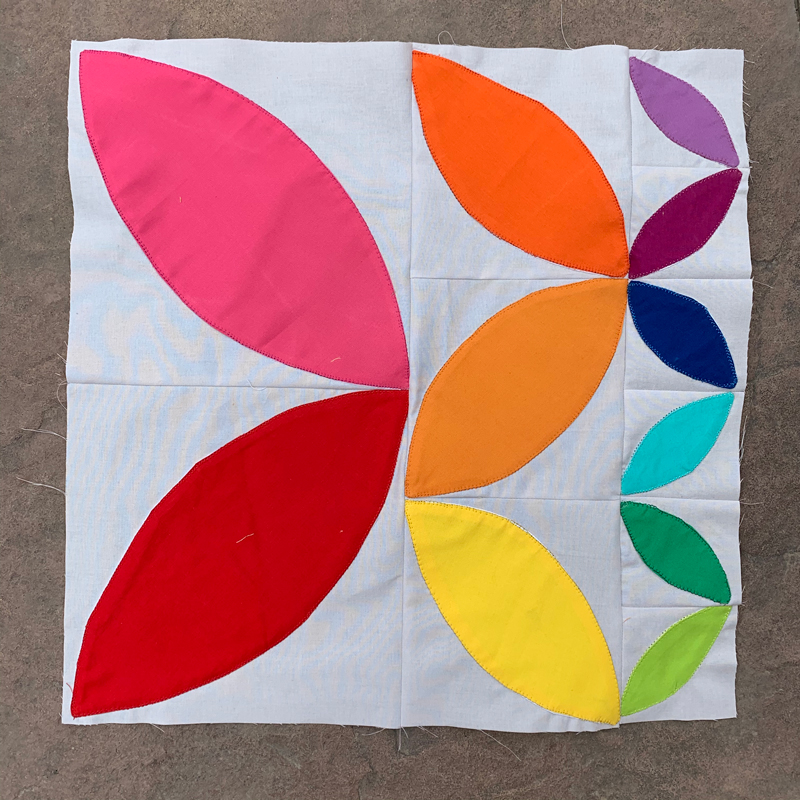
Step 3 – Block Assembly
Sew the quarter circle units together into rows.
Sew the rows together into the block.
Trim block to 18.5″
On Instagram make sure to use
#bouldermqgbom20 and tag us
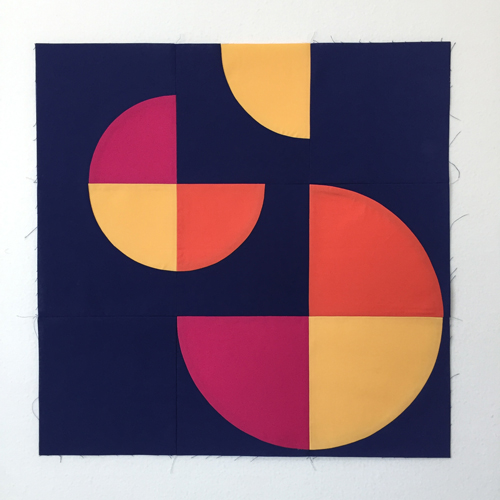
@bouldermqgMay 1, 2020 | 2020 Block of the Month, Tutorial
By Rebecca Greco
Orange Peel Applique Supplies
Thin, fusible interfacing
Scissors and//or rotary cutter
Fabric, thread, sewing machine
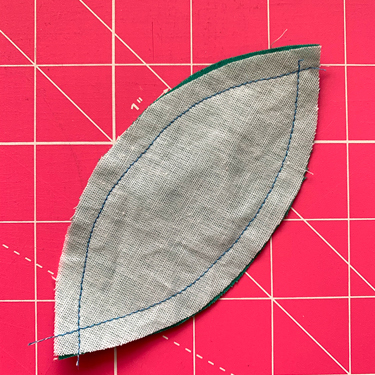
Orange Peel Applique Instructions
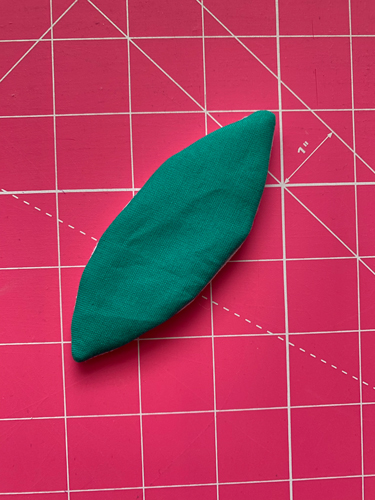
Step 1 – Make Templates
Print Template 2 at 100% (be sure the 1″ scale square on the template actually measures 1 inch when printed. Some printers don’t print a true 100%. Carefully cut out the templates on the printed lines. The largest orange peel will print on two pages. You can either tape together the pieces, or fold your fabric in half and use half of the printout.
Step 2 – Cut Fabrics
Cut one square of your backing fabric about 3/4″ larger than your final piece. After we will trim down the block, but this gives you room for error and ensures you will have enough space for your seam allowance.
Using the template, cut an orange peel from both the fabric and the interfacing. I just cut it out with scissors.
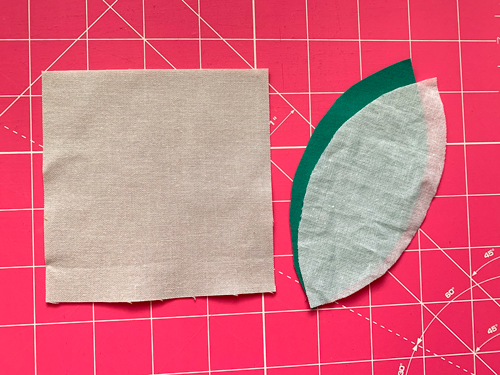
Step 3 – Sew the Orange Peel
Layer the orange peel fabric right side against the adhesive side of the interfacing. Sew a 1/4″ seam around the whole peel.
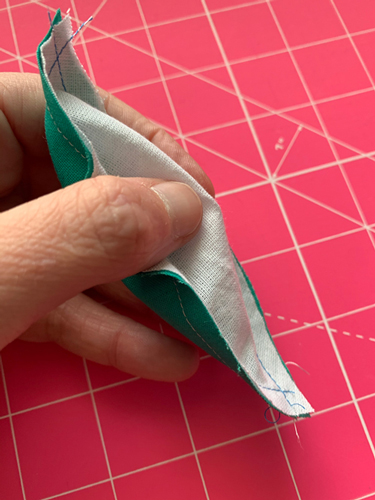
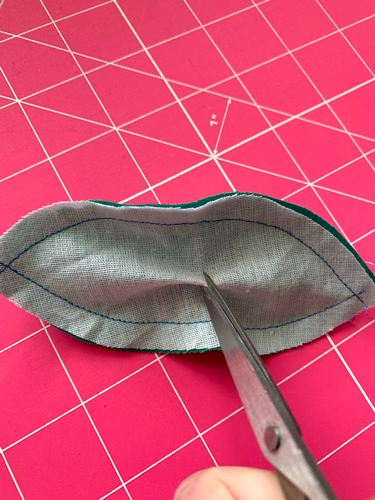
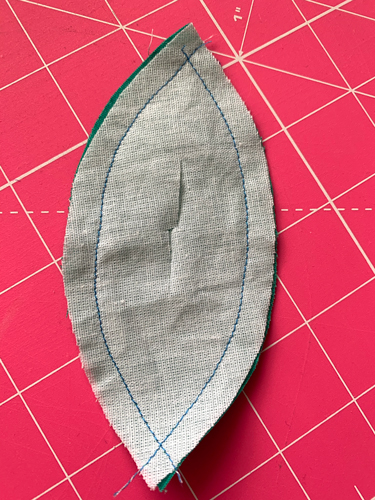
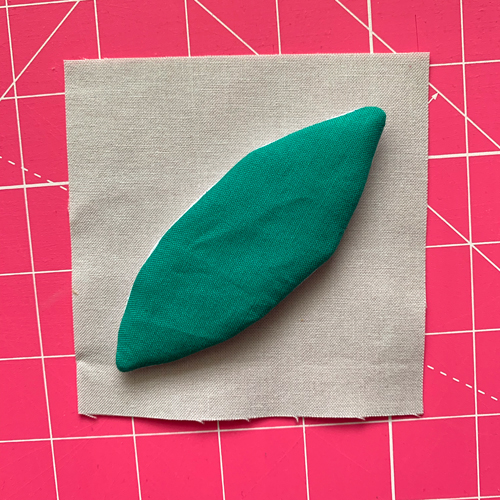
Step 4 – Cut Interfacing
Use scissors to carefully cut a slit into the interfacing. Make sure you pull the interfacing away from the fabric so you don’t accidentally cut the fabric. Increase the slit side as much as necessary to create a hole to turn the fabric.
Pull the fabric through the hole in the interfacing to turn it right side out. Use a chopstick, pen, or other tool to help get all the points.
Step 6 – Iron to Backing Fabric
Using the interfacing instructions, iron the orange peel onto your backing fabric.
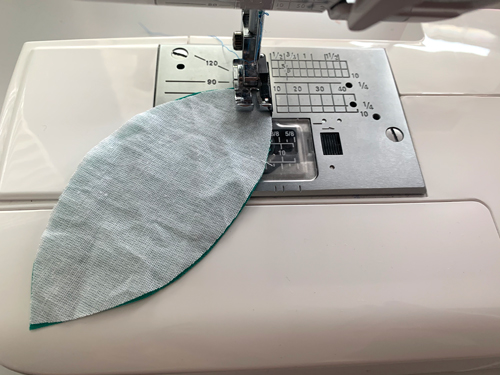
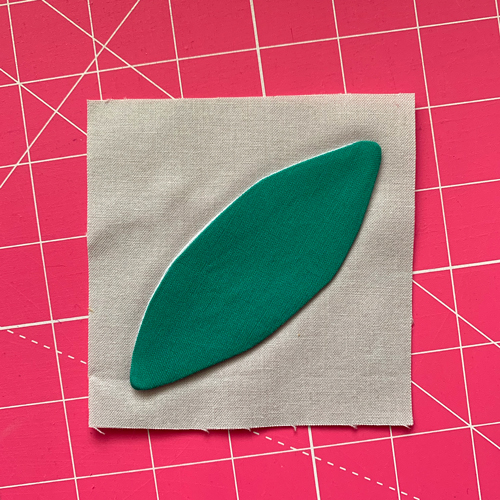
Step 7 – Applique to Backing Fabric
Use your preferred applique method. I used machine applique, but this would be a great hand stitching project.
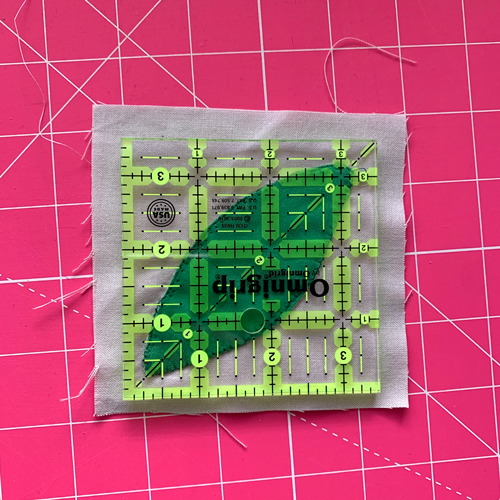
I used a small square quilting ruler and lined the diagonal along the orange peel. Make sure there is 1/4″ seam allowance on each side of the orange peel.
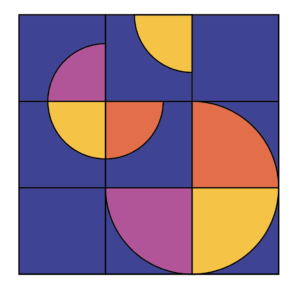
Apr 1, 2020 | 2020 Block of the Month, Tutorial
 By Anne Deister
This month’s BOM uses two different Drunkard’s Path blocks (as described in the Skill Builder tutorial) to create a modern, asymmetrical layout. The layout challenges you to match curves when aligning blocks and to have some curves come right to the edge of the block while others have negative space around them and float within the space.
By Anne Deister
This month’s BOM uses two different Drunkard’s Path blocks (as described in the Skill Builder tutorial) to create a modern, asymmetrical layout. The layout challenges you to match curves when aligning blocks and to have some curves come right to the edge of the block while others have negative space around them and float within the space.
CUTTING INSTRUCTIONS
Using Templates 1 and 2 provided in the Drunkard’s Path skill builder tutorial, cut the following pieces.
Fabric A – dark blue/violet
Cut (2) 6.5″ squares
Cut (4) from template 1B
Cut (3) from template 2B
Fabric B – yellow
Cut (2) from template 1A
Cut (1) from template 2A
Fabric C – orange
Cut (1) from template 1A
Cut (1) from template 2A
Fabric D – pink/purple
Cut (1) from template 1A
Cut (1) from template 2A
Using the Drunkard’s Path Skill Builder tutorial, sew the quarter circle units together.