Oct 10, 2020 | 2020 Block of the Month

By Karla Haynes
CUTTING INSTRUCTIONS
Background fabric (half yard):
- Four (4) 5 inch triangles (for this you will need to start with a 5 in strip
- One (1) 2.25 in x 19 in strip
- One (1) 8.5 in x 19 in strip
- One (1) 2 in x 9.25 in
- One (1) 9.25 x 6.75 in
Triangle Fabric:
- Two (2) 5 in triangles of each colors (for this you will need a 5 in strip at least 10 in wide of each fabric)
Cutting the Triangles
For methods on cutting triangles with either a 60° equilateral triangle ruler or a standard quilting ruler, read this tutorial.
Assembling the Triangles
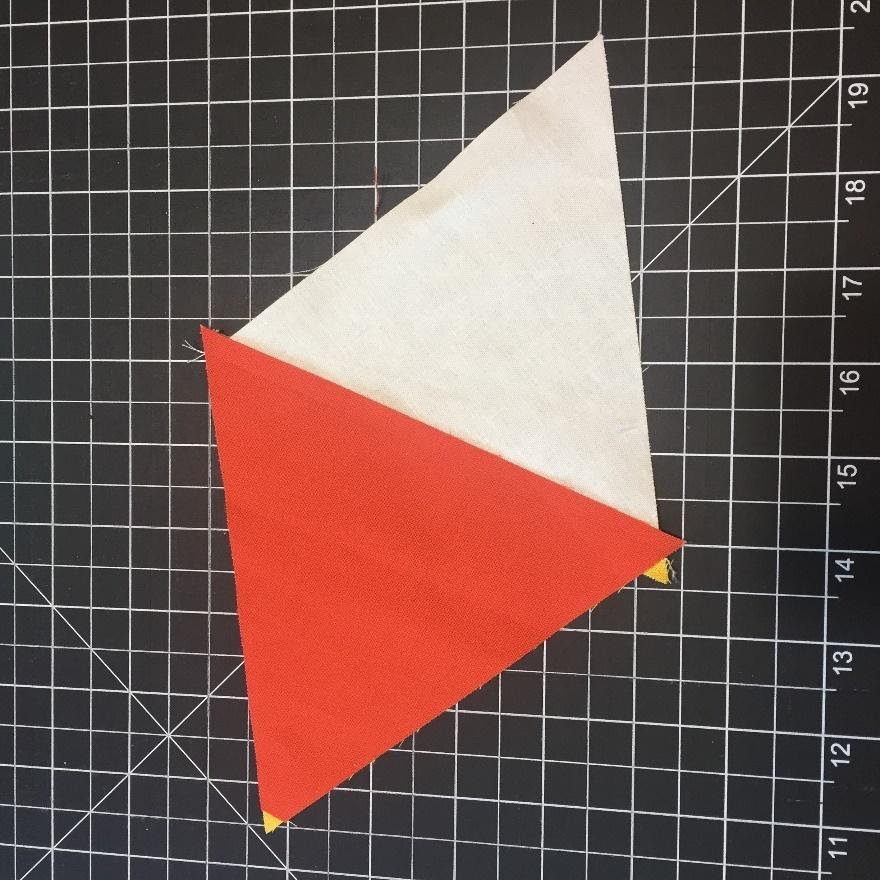
Step 1
Layer two triangles right sides together and sew a .25 inch seam, press open. You can assemble all the background triangles to an internal triangle to save time.
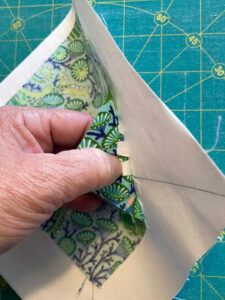
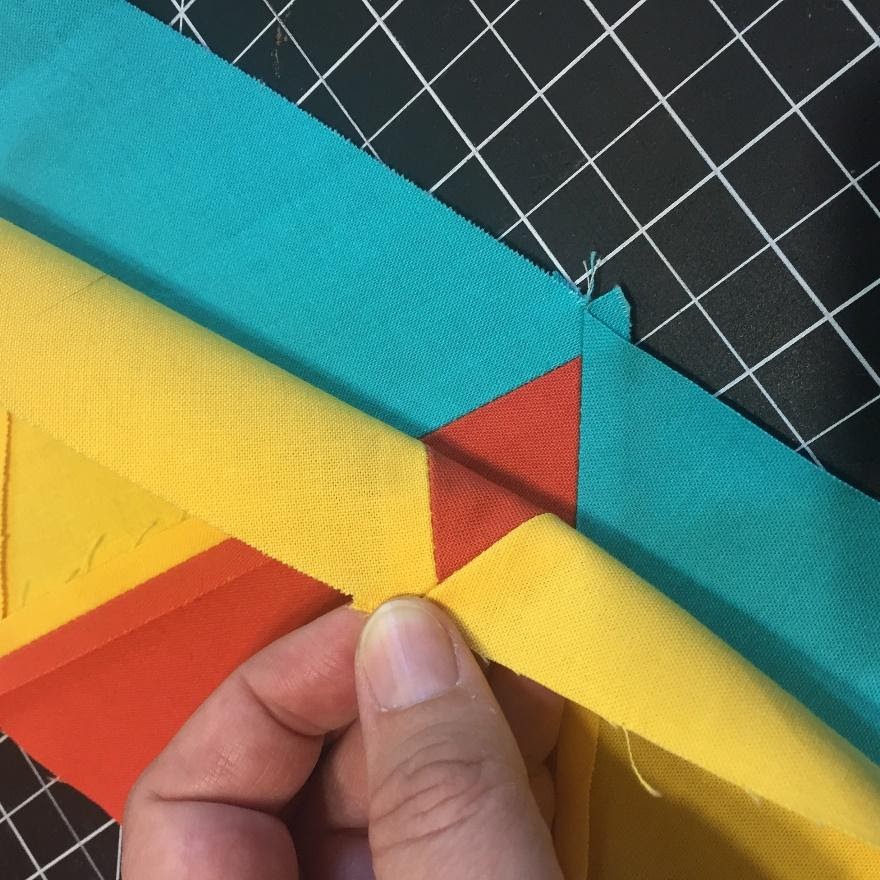
Step 2
Layer a triangle over for the next position, with the clipped tip on the side you intend to sew a seam.
Step 3
Stitch a .25 inch seam and press open.
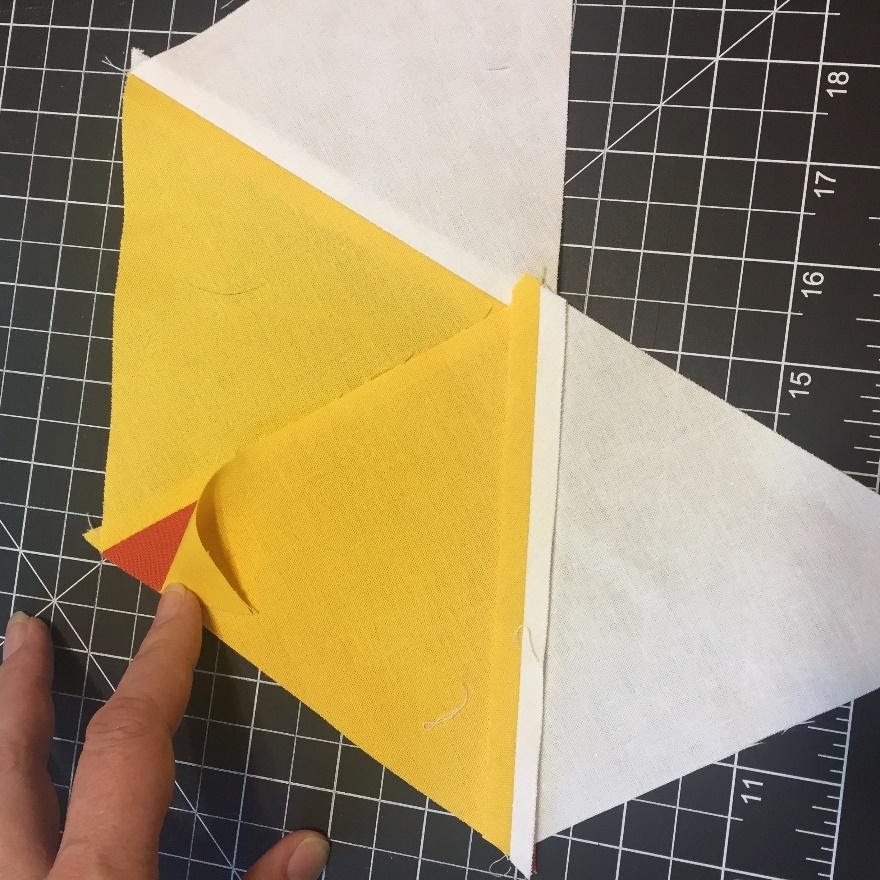
Step 4
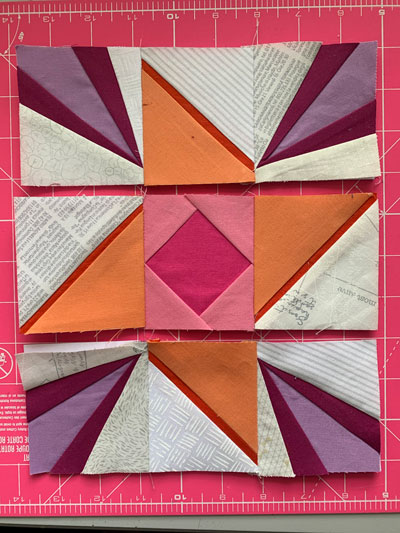
Assemble the other half of the hexagon by layering the triangles as shown in the picture below. Sew along the side seam and press open.
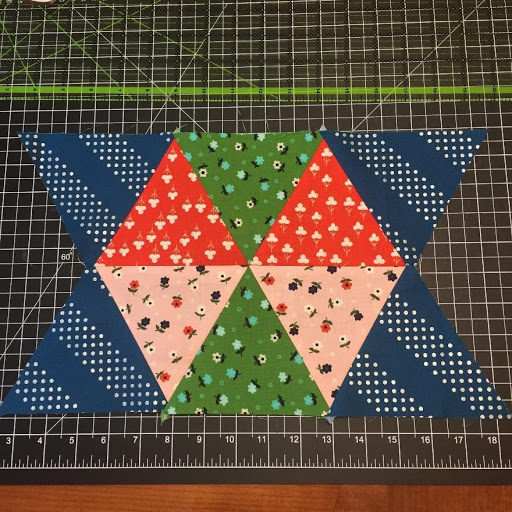
Step 5
Once the two halves are ready, line up the tips of the center triangles – there should be a .25 seam allowance above the triangle tip.
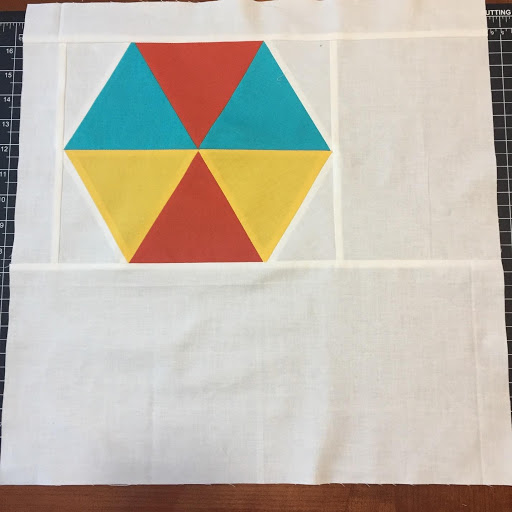
The shape should look like this:
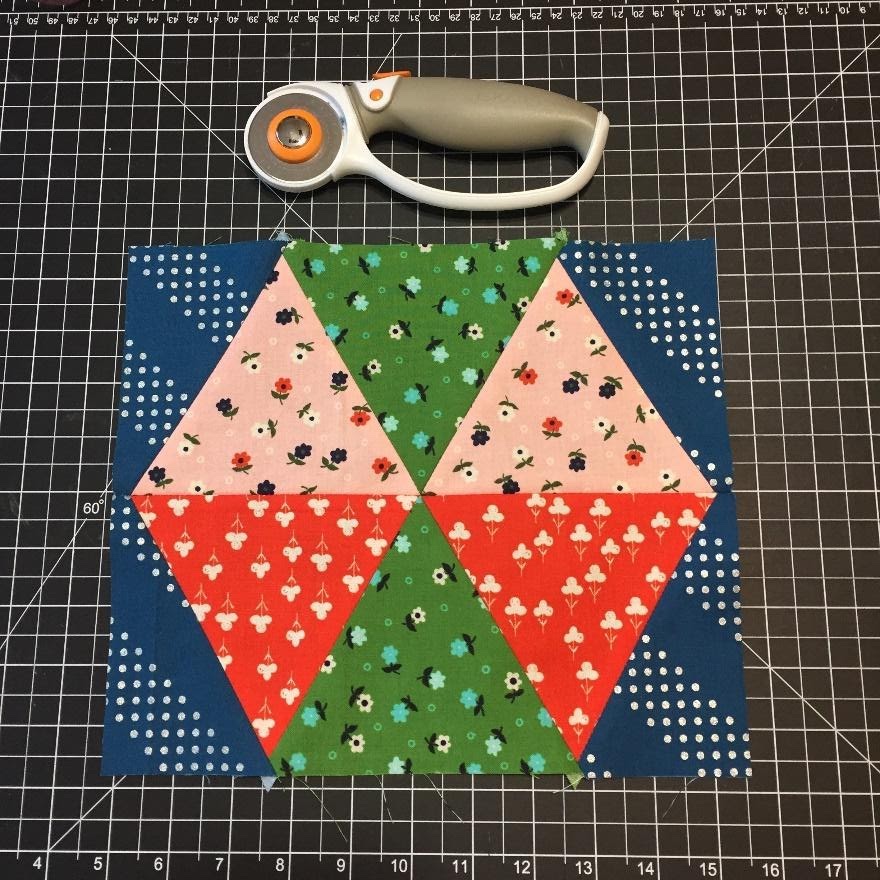
Step 6
Trim the hexagon piece to approximately 9.25 in x 10.75 in, being careful to preserve the seam allowance outside the points of the triangles. If it ends up a little larger or smaller, the other fabric cuts will allow this.
Assembling the Triangles
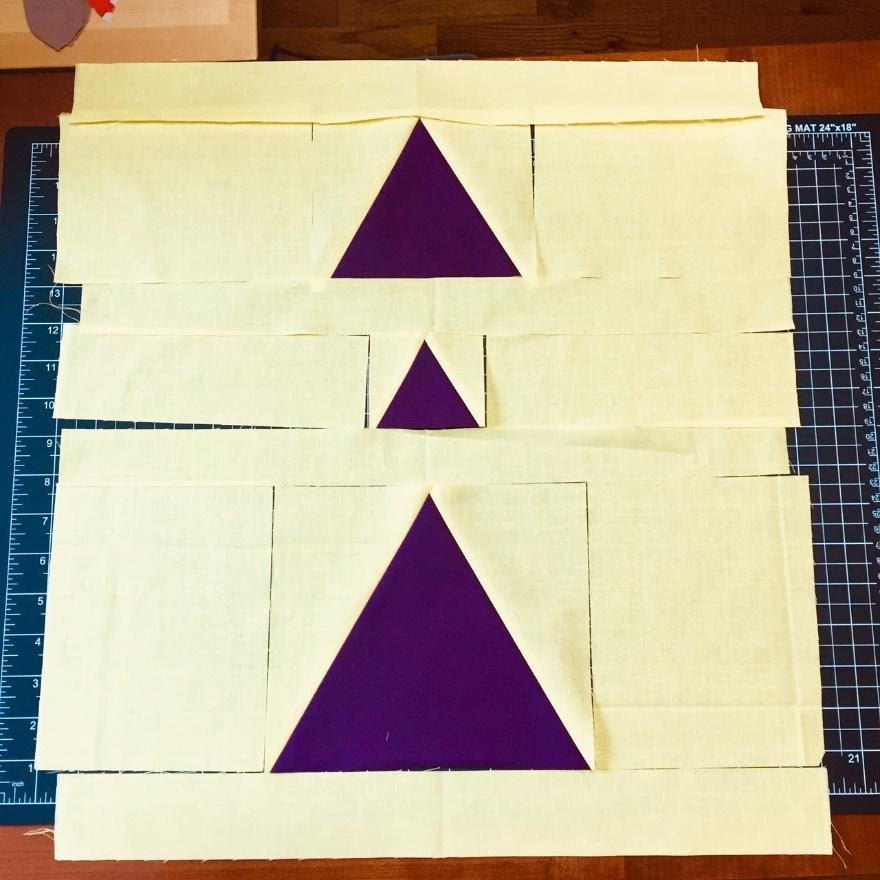
Step 1
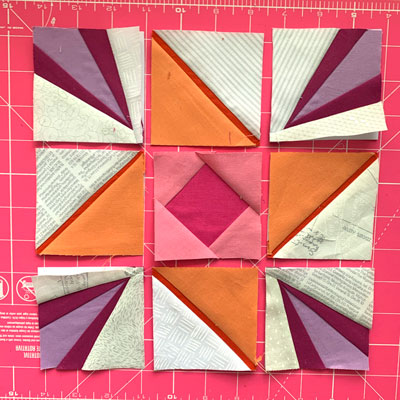
Arrange your pieces as indicated in the photo below and stitch together your triangle rows first using a .25 in seam allowance, careful to align the triangle points.

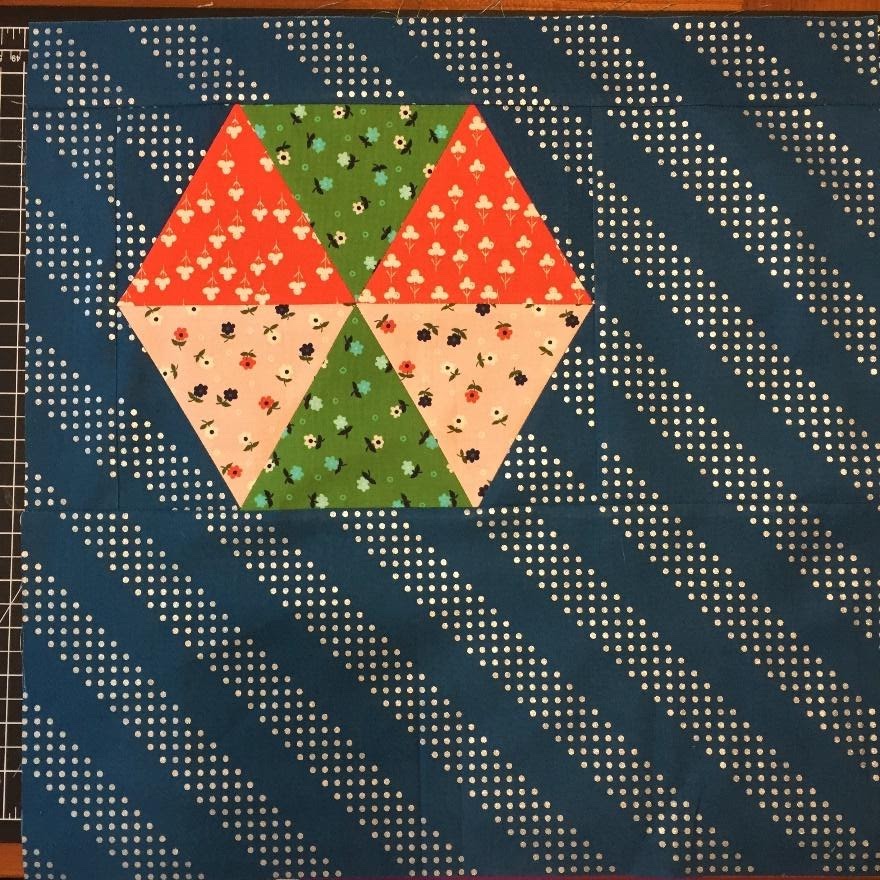
Step 2
Stitch together all rows.
Step 3
Trim block to 18.5 in square.
On Instagram make sure to use #bouldermqgbom20 and tag us @bouldermqg
Aug 31, 2020 | 2020 Block of the Month
By Cara Cansler

CUTTING INSTRUCTIONS
Background Fabric
One (1) 19” square.
Inset Circles
Sew together scraps to make one (1) 9” square
One (1) 5” square
One (1) 4” square

BLOCK INSTRUCTIONS
Step 1 – Make Templates
Using the inset circle tutorial, make the necessary circle templates.
Templates needed:
-
- 8″ circle
- 3.5″ circle
- 2.5″ circle
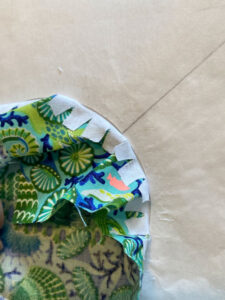
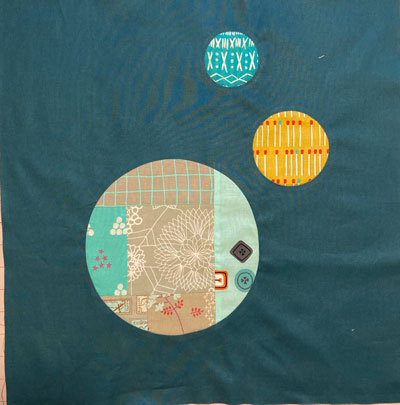
Step 2 – Inset Circles
Using the Inset Circle Tutorial, place the 8” circle template so the edge of the circle is 3 ⅛” away from the left edge and 3” away from the bottom edge of the background square. Follow the inset circle tutorial to inset the 9” pieced square.
Using the 3 ½” Circle Template, place the template so it’s 3 ¼” from the Left side of the block and 5 ¼” from the top. Notice that the template should be ironed onto the back of the block. Again, follow the inset circle tutorial to inset the 5” piece of fabric.
Using the 2 ½” circle template, place the template so the circle is 6 ¼” from the left side and 1 ¾” from the top. Inset the 4” piece of fabric.

Step 2 – Finish Block
Press and trim the background to 18 ½” square.
On Instagram make sure to use #bouldermqgbom20 and tag us @bouldermqg
Aug 31, 2020 | 2020 Block of the Month, Tutorial
By Cara Cansler
Inset Circle Supplies
6 ½” square of background material
5” square of circle material
Freezer Paper
Stick Glue
Compass or a circle cutter
Quilting ruler, thread, zipper foot, sewing machine
Inset Circle Instructions
For the BOM we’ll make 3 sizes of inset circles, but for the tutorial we’ll be making 1 circle in square block.
Step 1 – Make Templates
Cut 2 – 6 ½” squares of Freezer Paper. Notice there’s a shiny side and a paper side of the paper. The shiny side will stick to fabric when ironed on a cotton fabric.
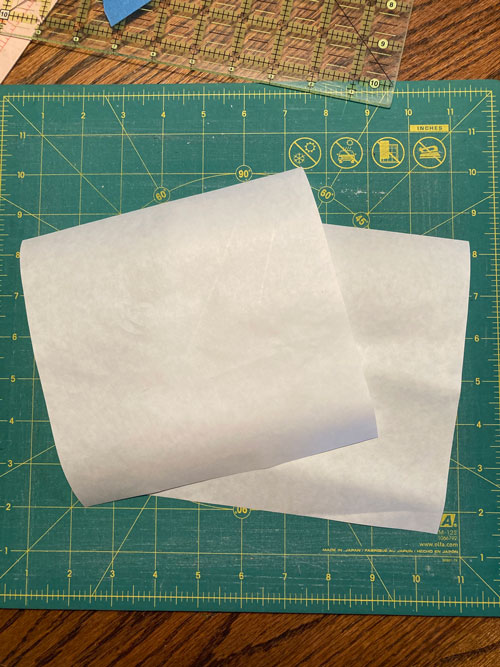
I placed the 2 sheets of freezer paper on top of a piece of fabric with both sheet’s shiny side towards the fabric. Use fabric so the paper doesn’t stick to the ironing board.
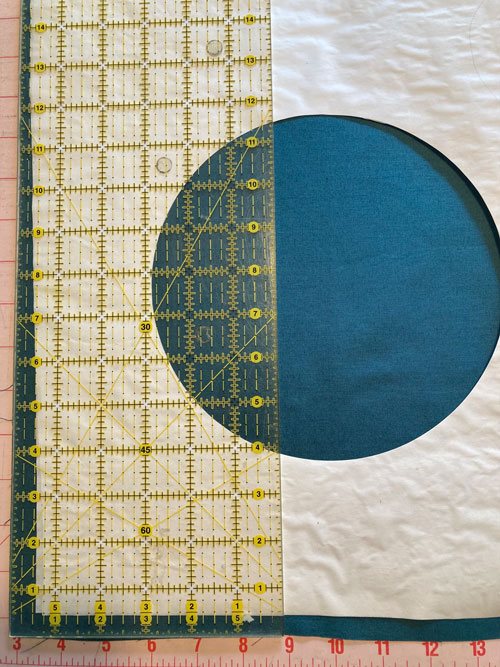
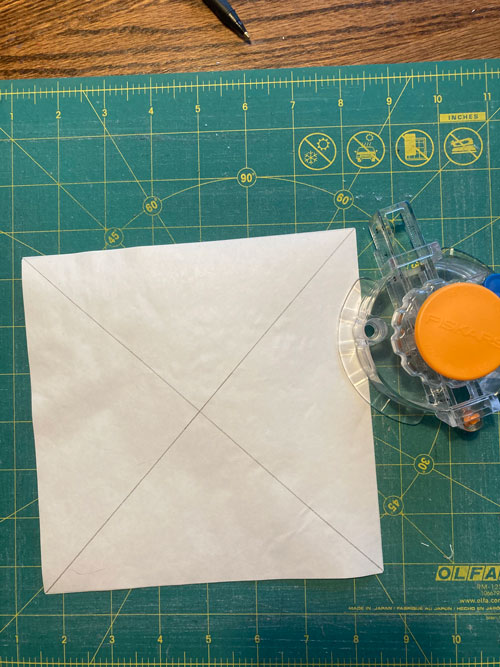
Draw lines diagonally to find the center of the square. Use a compass or a circle cutter to cut out a 3 ½” circle in the middle of the template.
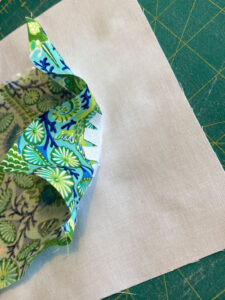
Step 2 – Make Inset Circles
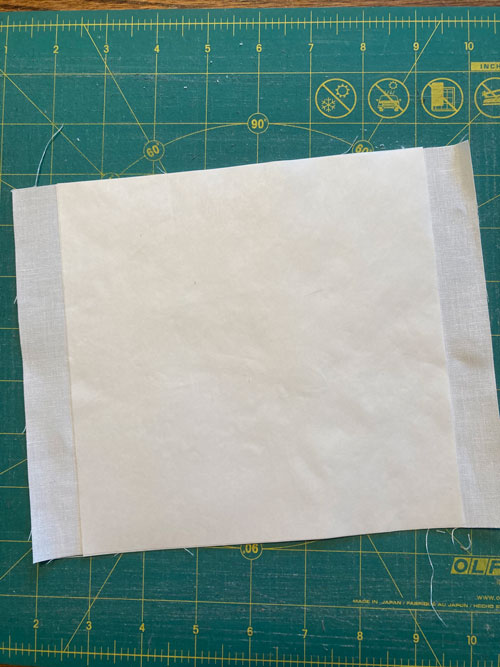
Iron 6 ½” freezer paper with the shiny side to the back side of your background fabric.
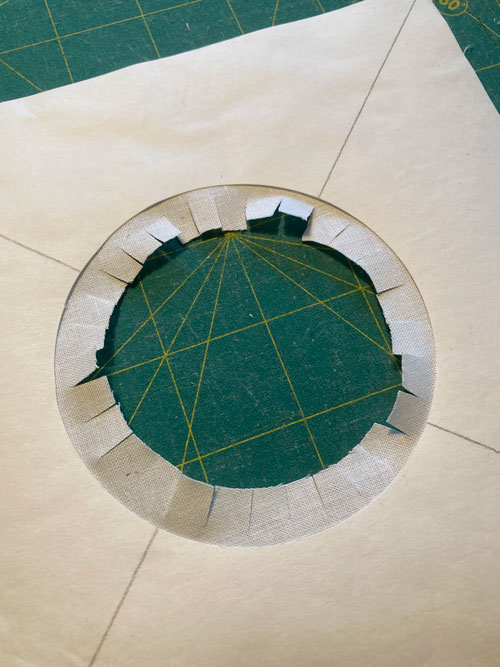
Cut out the center of the circle leaving about ½” of fabric from the template. Clip the seam allowance but stop at ⅛” from the template.
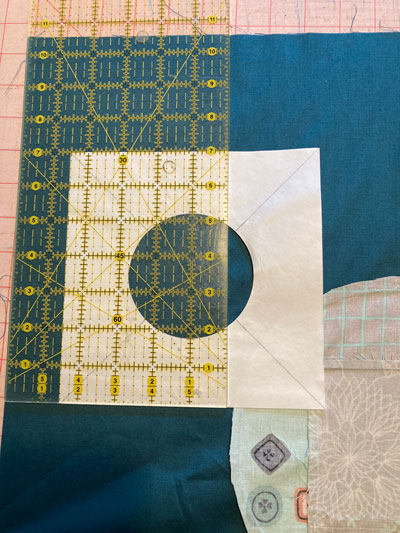
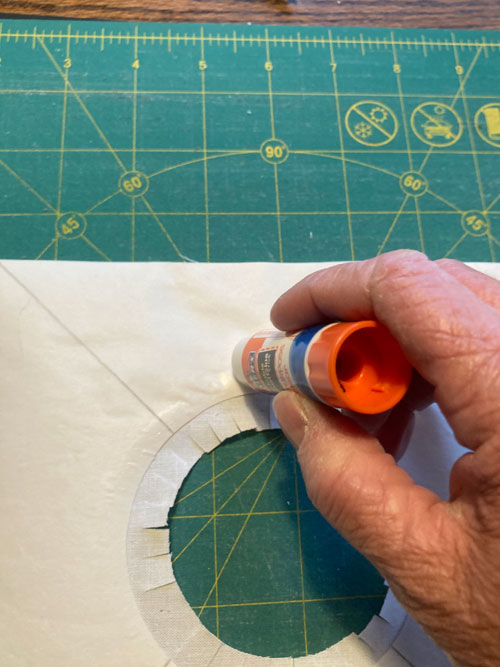
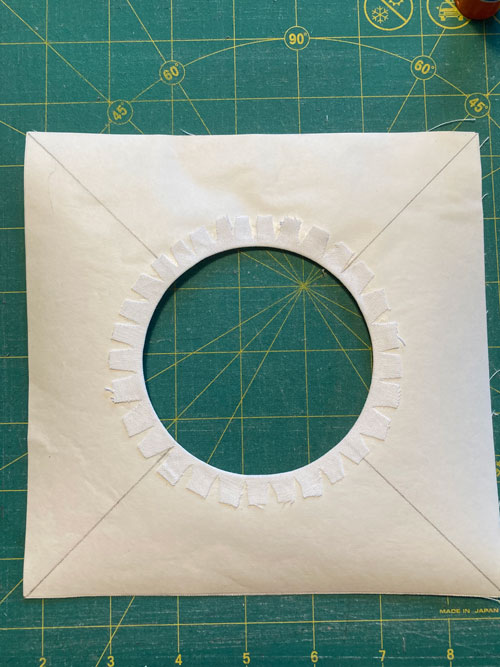
Lightly apply glue to the paper template and fold the background fabric around the inner circle so the glue holds the fabric. It may be helpful to do a couple of inches at a time.
Check the smoothness of the circle. If there are any edges that aren’t smooth enough, peel back the seam allowance and re-glue.
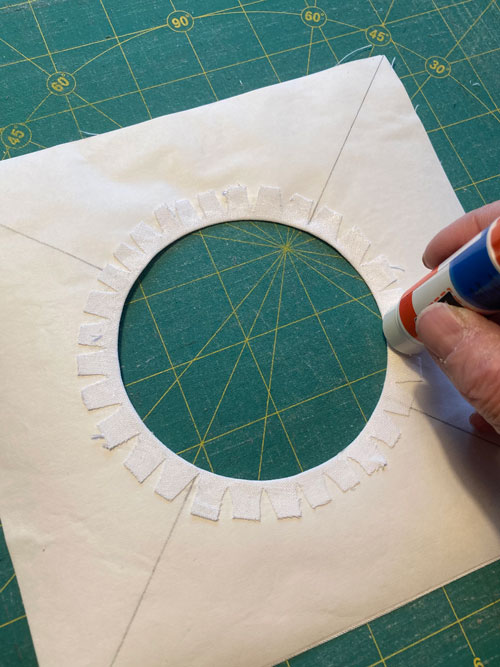
To attach the circle fabric, apply glue to the clipped seam allowance.
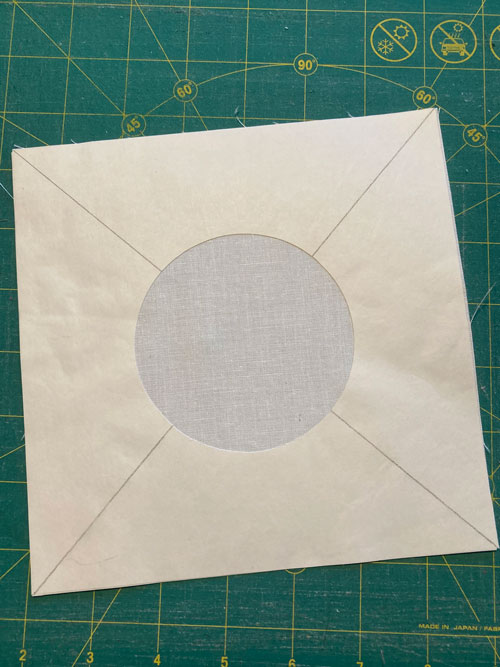
Place the circle fabric, right side down, over the glued area. Iron dry.

Carefully peel the background fabric away from the paper. Re-glue any spots of circle fabric that have come apart from the clipped seam allowance.
Carefully remove the Freezer Paper.
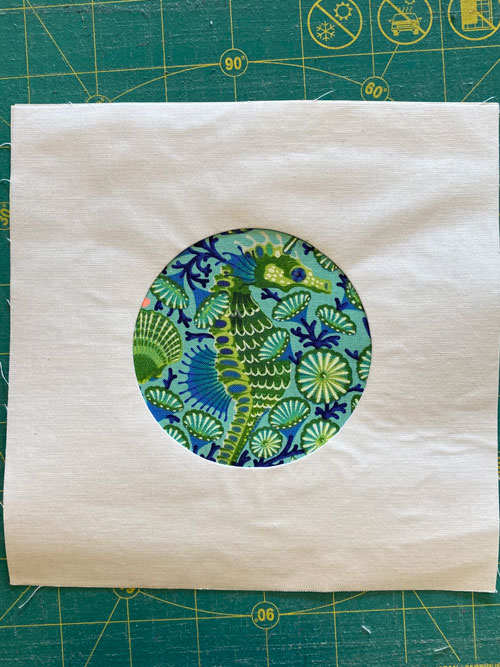
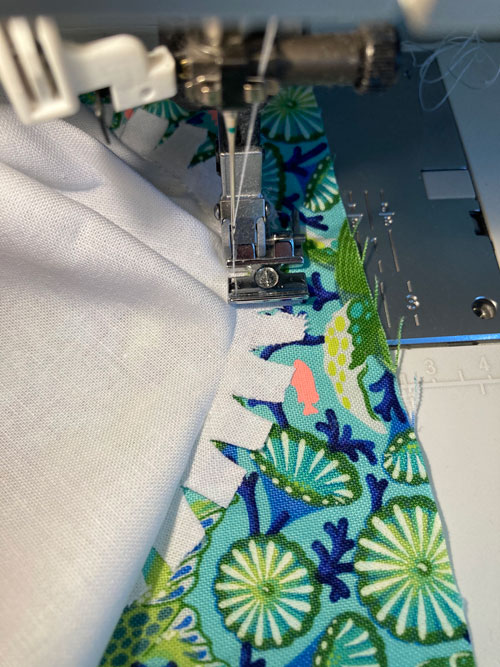
Step 3 – Sew Circle
Stitch in the crease with a zipper foot. If your stitching isn’t smooth, stitch over any uneven seams.
Trim the circle fabric, leaving about ¼” seam allowance.
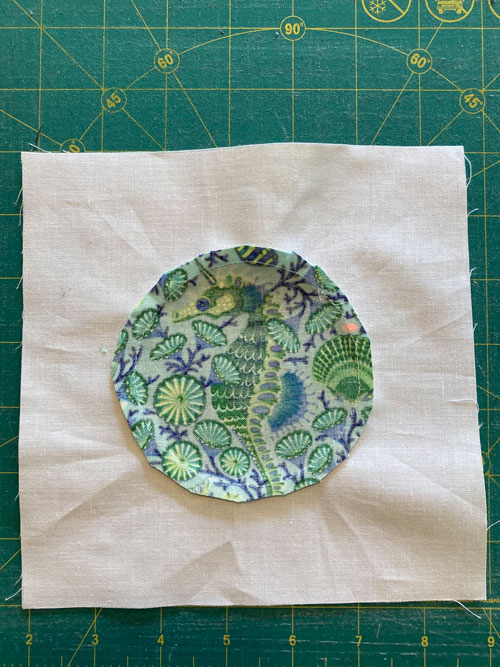
Step 4 – Press
By pressing the circle fabric with the seam allowance out, you achieve a pieced look. If you press the seam in, you’ll get an applique look.
Aug 3, 2020 | 2020 Block of the Month

By Karla Haynes
CUTTING INSTRUCTIONS
Background fabric (half yard):
- Two (2) 2.5 in x 19 in
- Two (2) 1.5 in by 19 in
- Two (2) 7 in x 6 in
- Two (2) 5 in x 7.25 in
- Two (2) 2.5 in x 8.5 in
- For Triangle backgrounds:
- One (1) 3 in x 6 in strip
- One (1) 5.5 in x 7 in strip
- One (1) 7.5 in x 10 in strip
Triangle Fabric (fat quarter):
- One (1) 3 x 4 in rectangle
- One (1) 5.5 x 7 in rectangle
- One (1) 7.5 x 9.5 in rectangle.
BLOCK INSTRUCTIONS
Step 1
Using the triangle in a square tutorial, make the necessary triangle pieces.
Triangles should measure:
-
- 2.5 in x 3 in wide
- 5 in x 5.75 in wide
- 7 in x 8 in wide
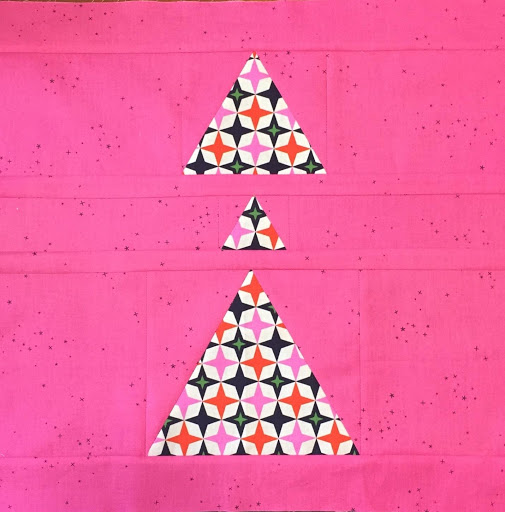
Step 2
Arrange your pieces as indicated in the photo below and stitch together your triangle rows first using a .25 in seam allowance, careful to align the triangle points. Stitch together all rows.
Step 3
Trim block to 18.5 in square.

On Instagram make sure to use #bouldermqgbom20 and tag us @bouldermqg
Aug 3, 2020 | 2020 Block of the Month, Tutorial
By Karla Haynes
Making the Triangles
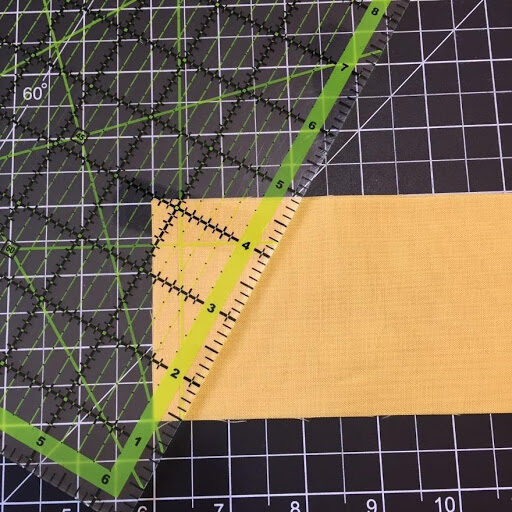
Method One – 60° Equilateral Triangle Ruler
I am using 60° equilateral triangle ruler by Creative Grids. I like this one because it has a center line to cut your outside pieces easily. It is a good investment if you like making triangles like I do, but is not needed if you are just going to make this one block!
Step 1
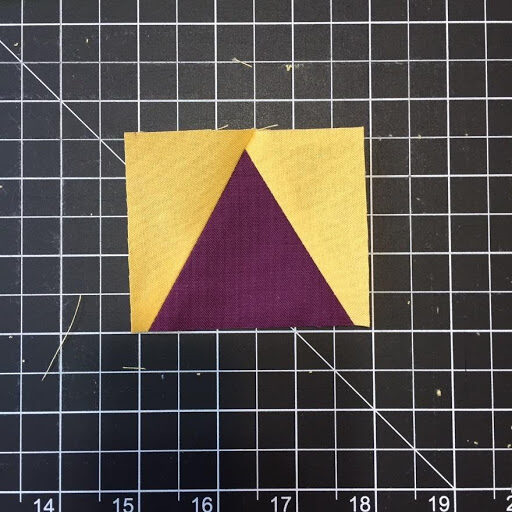
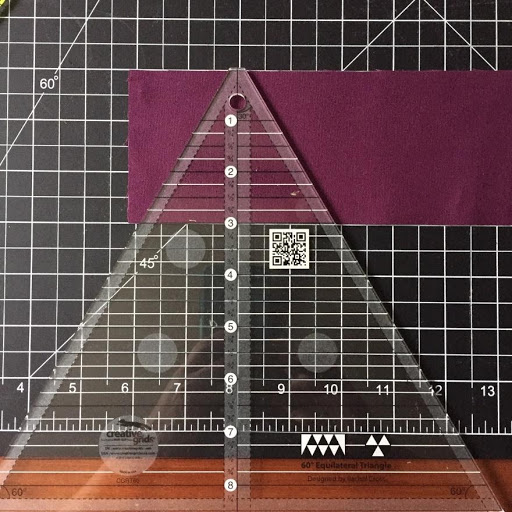
Lay your ruler over the top of the square, lining up the top of the triangle (flat edge) and the bottom of the square with the numbered line corresponding to the height of the block. For example, for the 3 x 4 in rectangle, you will align it on the 3 in line as in the photo below.
Step 2
Cut along both sides of the ruler to create your triangle. It will have a blunt top edge.
Step 3
For the outside pieces, fold your rectangle in half, and align the raw edges with the line to the left of the center line.
Step 4
Cut along the edge of the ruler, trimming the tiny corner off the opposite side.
Step 5
You will now have 3 triangle pieces. Fold down the outside piece and align the clipped edge with the bottom edge of the triangle.
Step 6
Sew a .25 in seam along the triangle edge. Press seams open. Align the second triangle edge in the same manner. Stitch a .25 inch seam along the opposite edge. Press open.
Step 7
Trim triangles according to the instructions below.
Method Two – Standard Quilting Ruler
This is a longer, more time-consuming method, but you can make this work just as well without any special tools.
Step 1
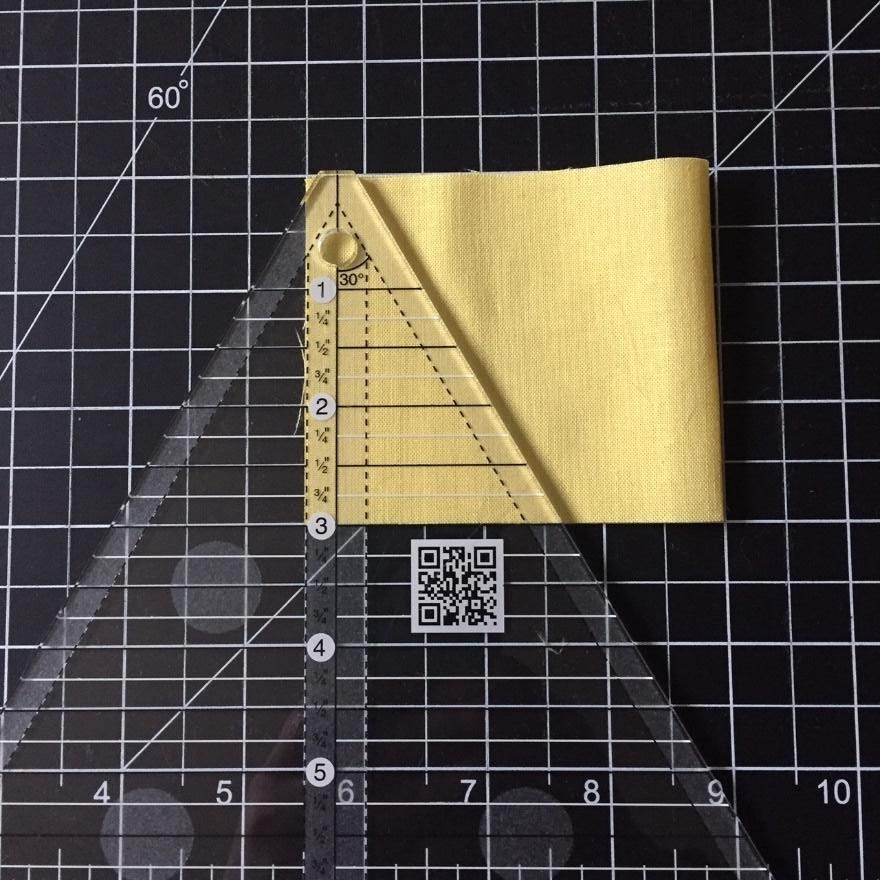
To cut the inside of the triangle, identify the 30° angle on your ruler and line up the edge of the ruler line it up with the edge of the square as in the photo below. The end of the line should meet the corner of your square. Cut along the ruler edge.
Step 2
Flip the fabric over and align the bottom of the 30° line with the bottom of the fabric. Ensure that you have a .25 in long flat edge along the top of your triangle by positioning your ruler as in the photo below. Cut the fabric along the edge of the ruler.

Step 3
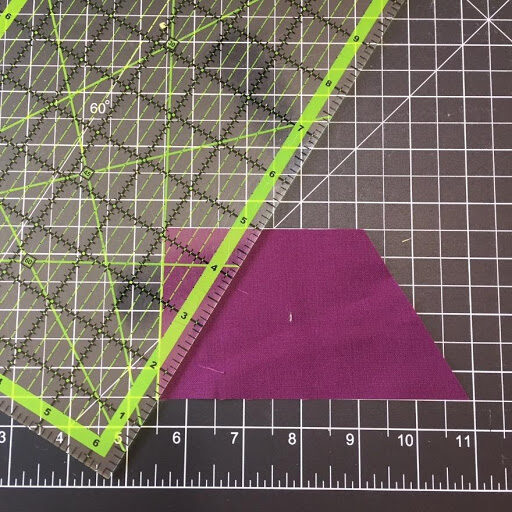
Cut the triangle background. On the short side of the fabric strip, mark a line on the back of your fabric 3/8 inches from the edge.
Step 4
Fold the strip in half, right sides together, with the marked side visible on top. Align your 30° ruler line along the marked line, with the bottom of the ruler touching the bottom edge of the fabric. Trim along the edge of the ruler.
Step 5
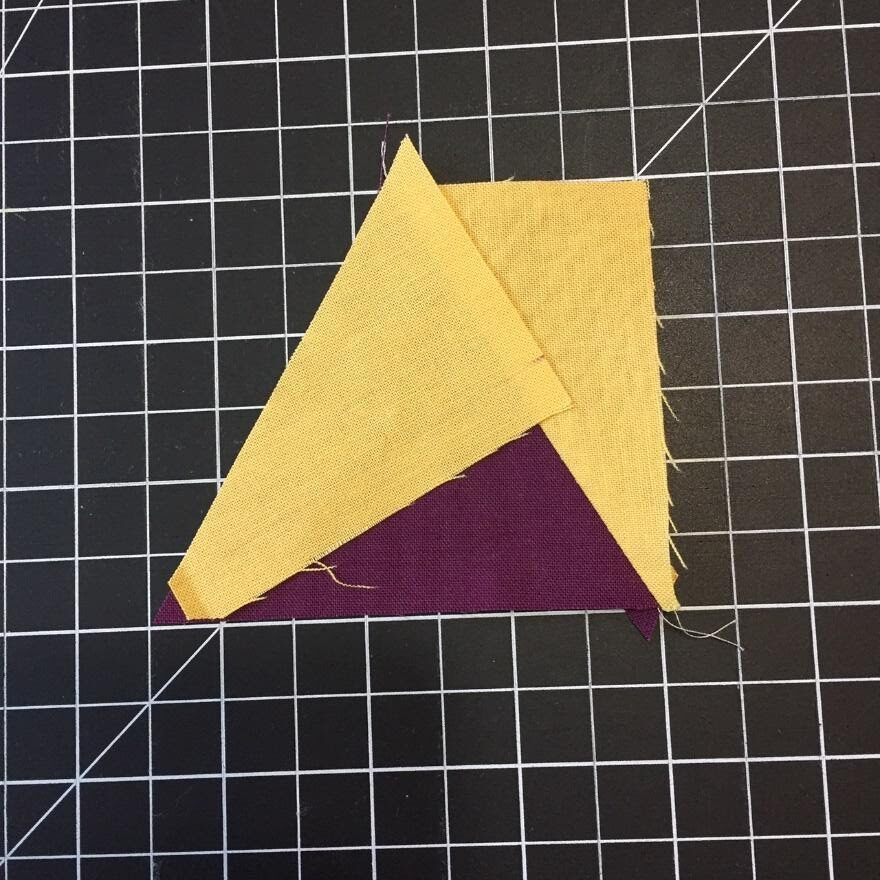
You will now have 3 triangle pieces. To assemble the triangles, line up the short side of the triangle outside with the triangle inside. The edges of the pieces should align, leaving a .25” ear at the top and bottom of the triangle. There will also be a small ear below the triangle bottom edge.
Step 6
Stitch a .25” seam and press open. Line up the other side, again leaving a .25” ear at the top. The ears of the background pieces will align and overlap. Stitch .25” seam and press open.
Step 7
Trim triangles according to the instructions below.
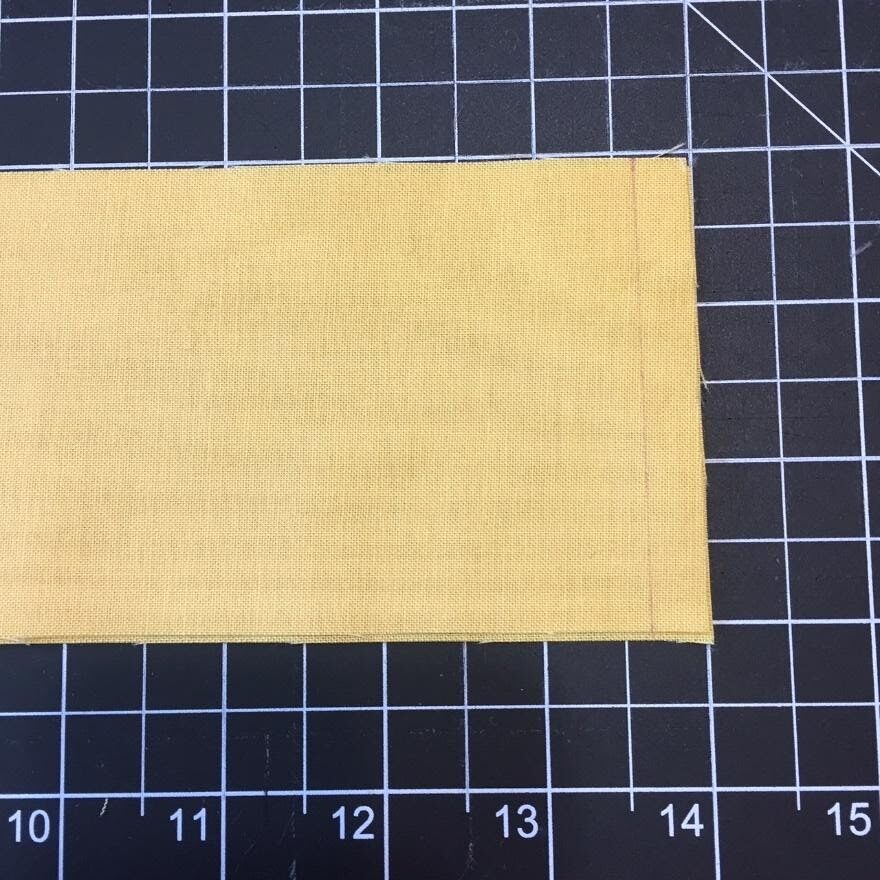
Trimming the Triangles
The triangle pieces will be a bit large. Trim the top and bottom of the triangle first. Make sure that there is a .25 in seam allowance above the top point of your triangle and trim the bottom edge second.
Step 1
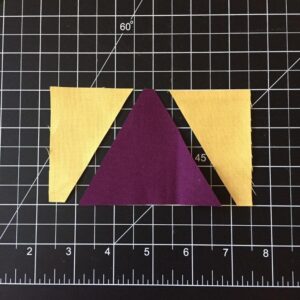
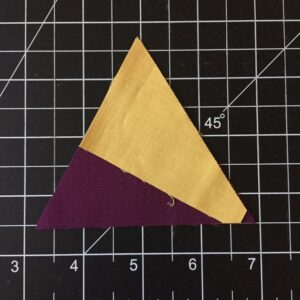
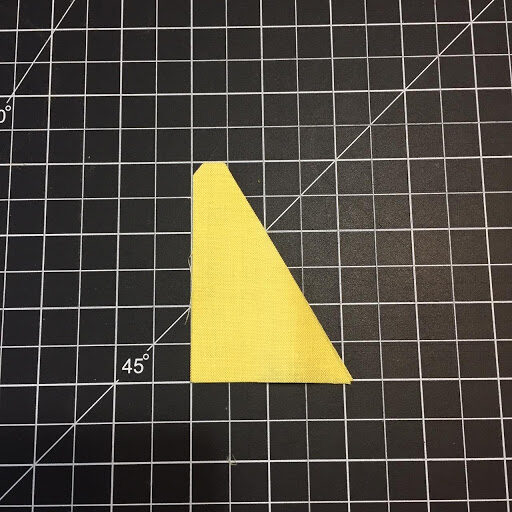
To trim the sides, line up the tip of the triangle along the center measurement of your triangle block and trim each side individually. For example, line up the 3 in wide triangle tip with the 1.5 in measurement to trim each side.
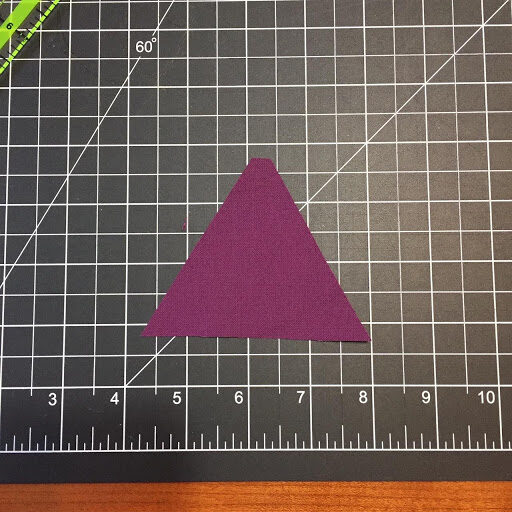
Your triangles will look like this when complete!
Jul 14, 2020 | 2020 Block of the Month

By Rebekah Texer and Rebecca Greco
This month’s BOM is a great introduction to foundation paper piecing and can be customized tons of ways depending on where you place your fabrics. If you are unfamiliar with foundation paper piecing, read the full tutorial here.

FABRIC INSTRUCTIONS
This block was made with 6 solid fabrics and low volume background fabrics, but could be made with more or less.
BLOCK INSTRUCTIONS
Step 1 – Print and Prepare Templates
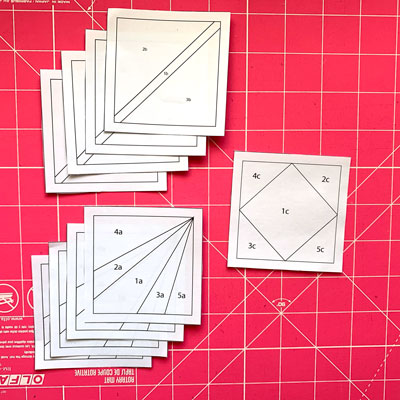
Click here for the templates.
Print the templates at 100%. Measure the square to ensure it is the correct size. The number of copies needed is indicated on each sheet. Cut out the templates, the 1/4″ seam allowance has been added to each piece.
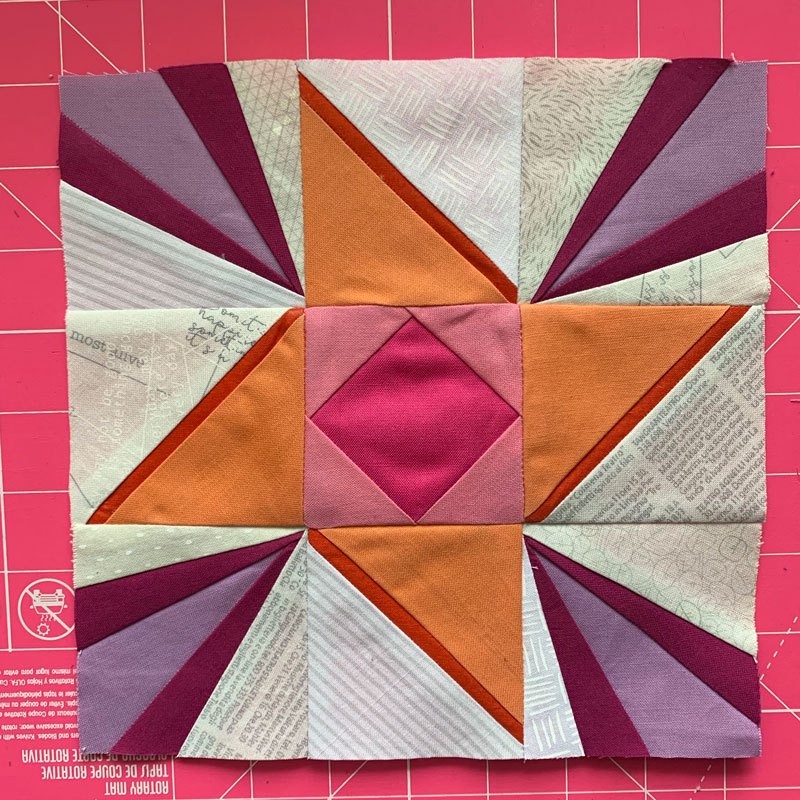
Step 2 – Make Pieces and Layout Block
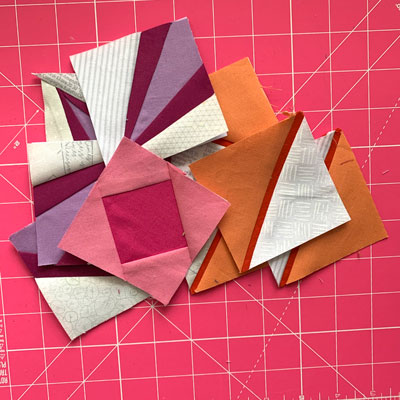
Make all the of the pieces necessary for the block. Use this foundation paper piecing tutorial if necessary. There are three different template pages but you will be making a total of 9 pieces. All of the pieces are the same, but layout the block like the photo, ensuring the pieces are facing the correct direction.
Step 3 – Block Assembly
Assemble the block in rows. Once assembled, remove the papers. Trim block to 18.5″
On Instagram make sure to use #bouldermqgbom20 and tag us @bouldermqg