

By Rebekah Texer and Rebecca Greco
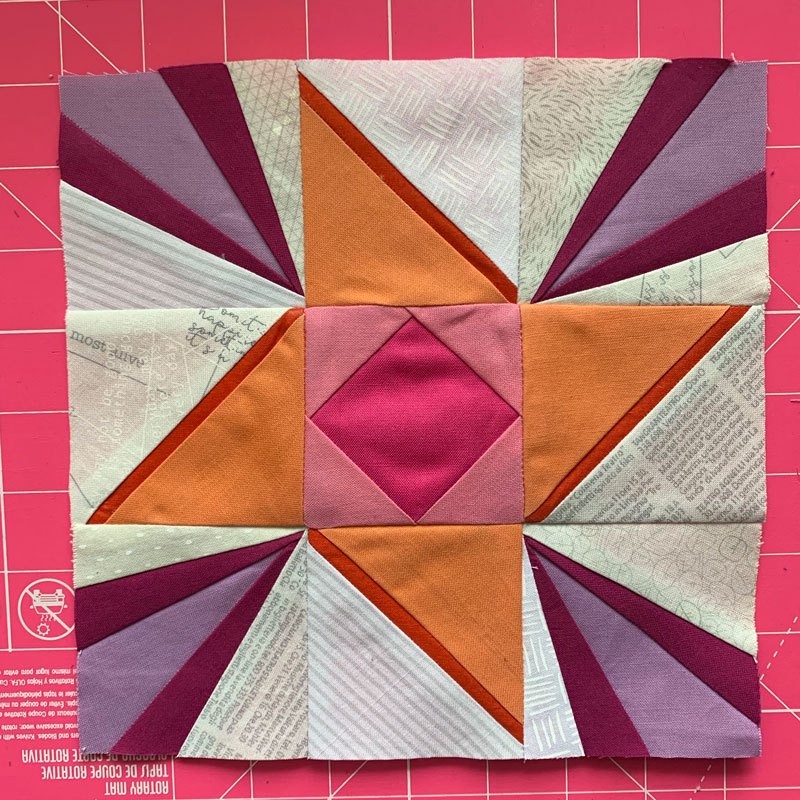
This month’s BOM is a great introduction to foundation paper piecing and can be customized tons of ways depending on where you place your fabrics. If you are unfamiliar with foundation paper piecing, read the full tutorial here.

FABRIC INSTRUCTIONS
This block was made with 6 solid fabrics and low volume background fabrics, but could be made with more or less.
BLOCK INSTRUCTIONS
Step 1 – Print and Prepare Templates
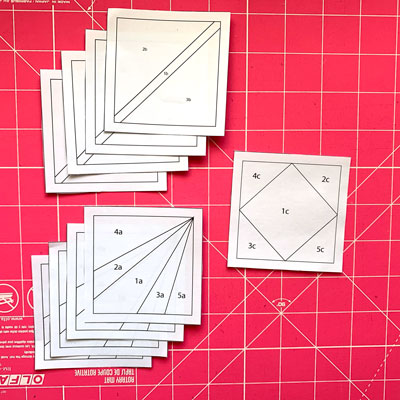
Print the templates at 100%. Measure the square to ensure it is the correct size. The number of copies needed is indicated on each sheet. Cut out the templates, the 1/4″ seam allowance has been added to each piece.
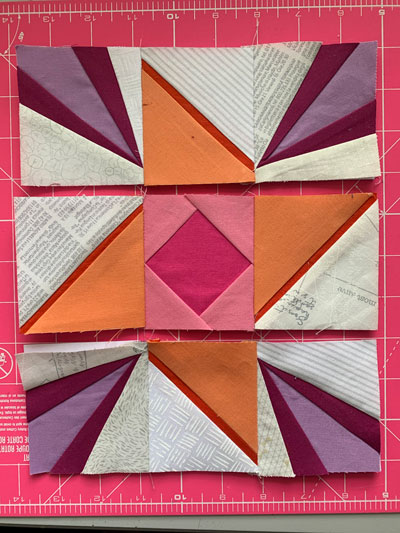
Step 2 – Make Pieces and Layout Block
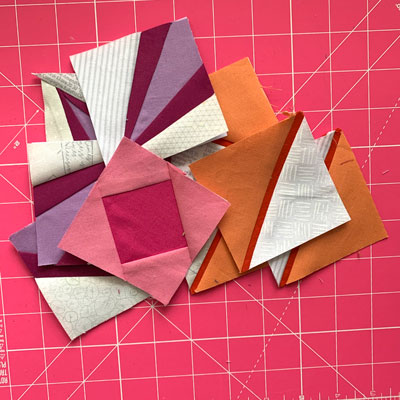
Make all the of the pieces necessary for the block. Use this foundation paper piecing tutorial if necessary. There are three different template pages but you will be making a total of 9 pieces. All of the pieces are the same, but layout the block like the photo, ensuring the pieces are facing the correct direction.
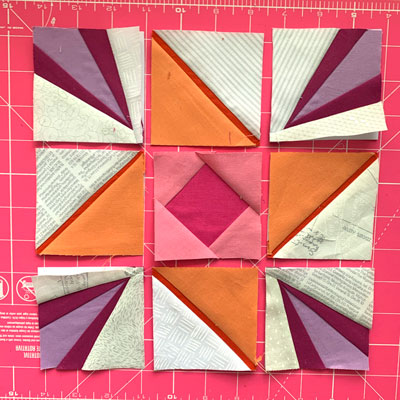
Step 3 – Block Assembly
Assemble the block in rows. Once assembled, remove the papers. Trim block to 18.5″
On Instagram make sure to use #bouldermqgbom20 and tag us @bouldermqg

This is a beautiful block! Thanks for all the effort to take pictures and explain how to make it.
I am having difficulties getting the templates. I can only get the templates with the rays on them. Am I missing a connection for the other two templates? I like your block and want to do it.
Hmm. It’s a three page PDF that has each of the templates. I will email it to you.