If you have been participating in our 2018 Block of the Month, you have finally made it to the end. Congratulations! Thank you for playing along. We’ve really enjoyed seeing everyone make each block their own by color choices and fabric selection.
Now that you have 12 blocks, it’s time to figure out how to put them together. Just as each person selects their own fabrics for the blocks, we would love to see unique ways of assembling your BOM sampler quilts. Therefore, we are not providing any instructions or measurements for assembling your blocks into a quilt. Instead, we are providing some examples of ways to consider laying out your quilt.

We’re pretty sure you have seen the 2018 Block of the Month sample quilt that was assembled before the year began. You are welcome to use this as inspiration for your final quilt assembly. However, we are not providing any yardage requirements or cutting instructions. Please also consider using one of the many other ways to assemble your final quilt layout.
We have put together a few examples of our favorites to show you here using the blocks from this year’s tutorials. Unless you want a small baby quilt, you will need to add a significant amount of background fabric, 2-3 yards, to your quilt layout. You can find more ideas and inspirations on our Block of the Month Pinterest board, under the “Sampler Layout Ideas” section. Please be sure to check that out, even just for color placement and fabric inspiration.
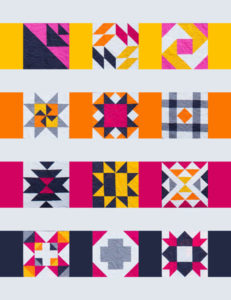
First, we are showing some layouts that offer an opportunity to use multiple background fabrics and little negative space without making more blocks. By assembling the blocks in rows with background stripes, you can use fabrics that appear in your blocks to pull the quilt together. You could also take a more regular approach to your layout and construct square-in-square blocks. We have shown this option in a checker pattern, but you could also make it scrappy.
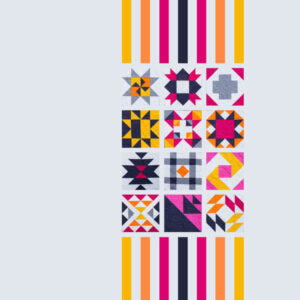
Next, we are showing several ways to use negative space with your BOM blocks. Each of these layouts gives a very modern feeling. Two of these layouts use multiple background fabrics to create stripes. The effect can be bold or subtle.


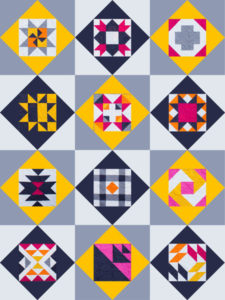
Last, we are showing a way to layout your blocks considering an alternative grid. The first example uses both an alternative grid and negative space to create an interesting block layout. The last example turns the blocks on point to create an alternative grid and also uses multiple background fabrics to create a stripe effect.


However you end up assembling your quilt, we are sure it will turn out wonderful! Please continue to share your quilt progress on Instagram with the hashtag #bouldermqgbom18. We want to see final layouts, re-made blocks, catch up blocks, and finished quilts! All of the tutorials will still be available on the blog. Thank you again to everyone who participated in our 2018 Block of the Month challenge, you have filled our year with inspiration and purpose.

Great ideas to spark the imagination! Thank you!
Thank you for this conclusion blog for the block of the month project. I loved choosing the different fabrics for the different blocks. I am looking forward to choosing a final layout that shows off those blocks. This year long project was well constructed, easy to follow and lots of fun! Many thanks!